Rpgmaker Mv How to Upload to Ios
i Overview
From this version, games created using RPG Maker MV will now be played using browsers which support HTML5 technology such as WebGL & 2DCanvas, WebAudio and JavaScript. Yous can also play games made using RPG Maker on iPhone, and iPad with Safari installed that also has HTML5 support.
Rather than explaining how to play using Safari, nosotros will explain in this department how to play your game every bit an iOS application. Running an HTML5 game as an application using an iOS device is like to running a game as an iOS application using a browser that supports HTML5. This method of development of running a spider web application every bit a native application is known by such names equally "Hybrid App," and is popular from the fact that it can be run on cross-platforms.
Browsers which bundle games as apps are "Browser Engines" which handle the Web display and sounds, and accept iOS built-in (called UIWebView). There are several frameworks that connect with browser engines as applications, but we will be using a framework called Apache Cordova here.
Operating Systems
It's possible to run a game on several different platforms every bit a hybrid app, but you volition essentially need a Mac PC with Bone X installed as your environment for creating iOS apps. Here we will be using Bone X 10.10. Additionally, the computer used to practice your work will exist referred to as "Mac".
2 Gear up the Packaging Environment
Installing games created using RPG Maker on iOS will require creating an ipa file. An ipa file is the installer for iOS apps and its extension is ipa. This is compressed in a ZIP format, and contains diverse necessary files for running the application. We will refer to creating the ipa file here as "Packaging".
Also, an Net connection is required to download some of the necessary developer tools.
2-ane Installing and Configuring Node.js and Apache Cordova
Put simply, Node.js provides an environment where you lot tin can run JavaScript outside of a browser. Cordova is provided every bit a Node.js bundle so allow'due south go ahead and install Node.js first.
2-1-1 Installing and Checking Node.js
Click [INSTALL] plant on https://nodejs.org/ and download the installer.
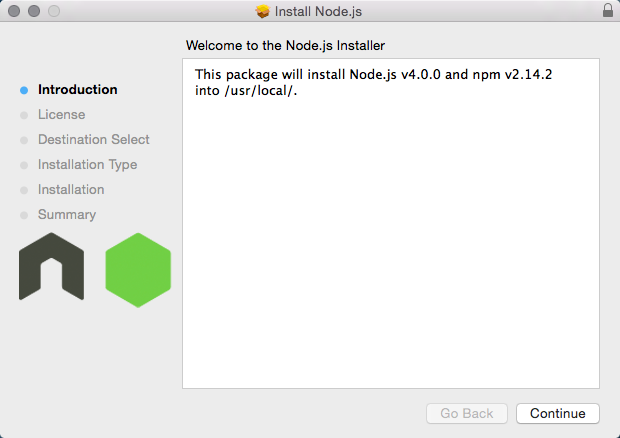
Run the installer. When prompted for the ambassador countersign, enter administrator password for your Mac and run the installer. The installation is consummate when this finishes.
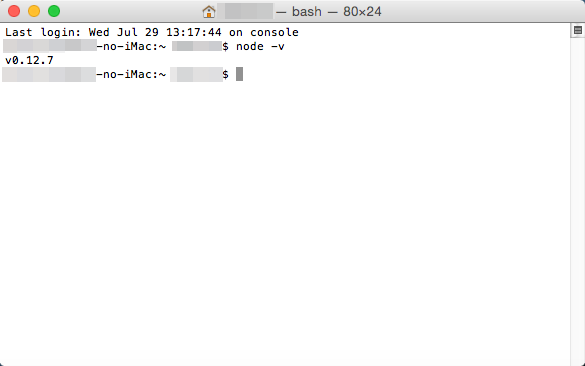
Ostend the Node.js installation using the final. The terminal tin be plant in Applications → Utilities. Later on the concluding starts up, enter "node -v" and printing the return key. If the version you installed is displayed, there is no problem.
$ node -5
ii-1-ii Installing Cordova
Cordova is provided every bit a Node.js package. The npm control which is a packet direction tool is provided in Node.js.
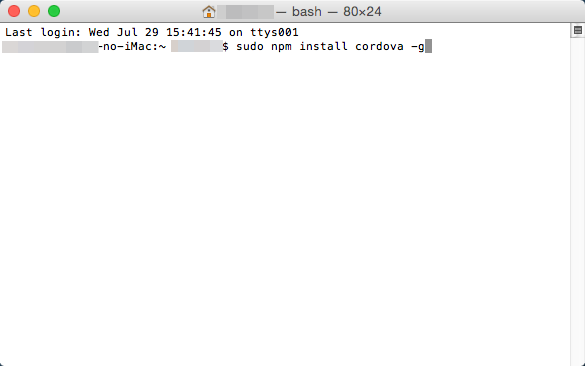
Enter "sudo npm install cordova -g" into the terminal and install Cordova. "sudo" is used to run processes and applications as an administrator on Macs. Run the "npm" command hither every bit an administrator. The "-g" option is an option which is used so that y'all can utilize Cordova in a global environment, and using this allows you to apply the within of any Mac folder.
You volition be asked for the administrator password and then enter the password and run the installation.
$ sudo npm install cordova -g
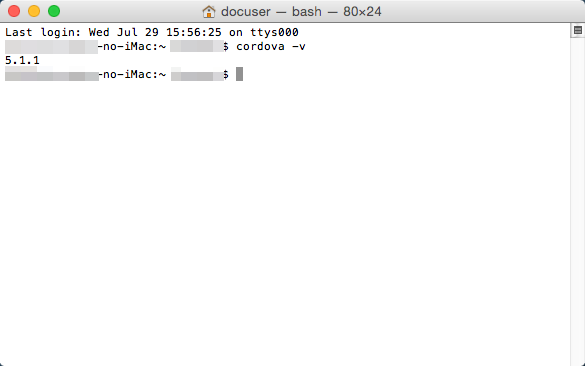
Confirm your version of Cordova. Enter "cordova -v" into the terminal and press the render key. If the version of Cordova is displayed, that means there is no problem.
$ cordova -v
2-two Xcode Installation and Setup
At that place are various required files included in the ipa file which are needed to run your application on an iOS device. In gild to classify all those files into 1 file, there is an application chosen Xcode for the Mac bachelor. Tools which permit you to do true evolution are also included with Xcode.
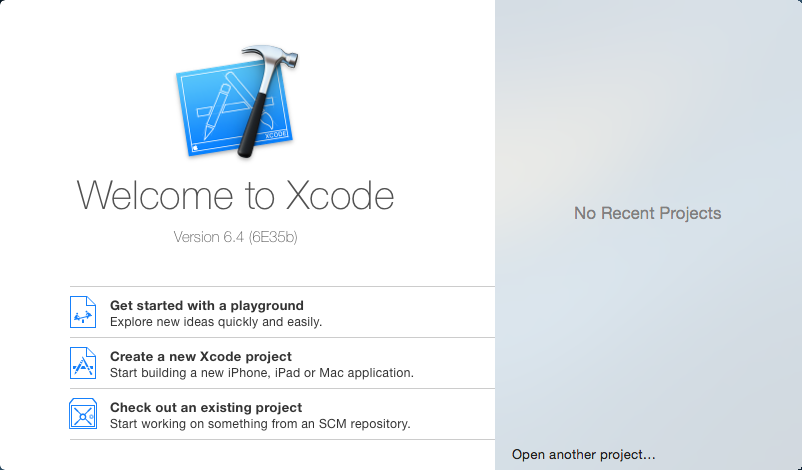
ii-2-1 Xcode Installation, Setup
You tin can get Xcode for complimentary from the App Shop.
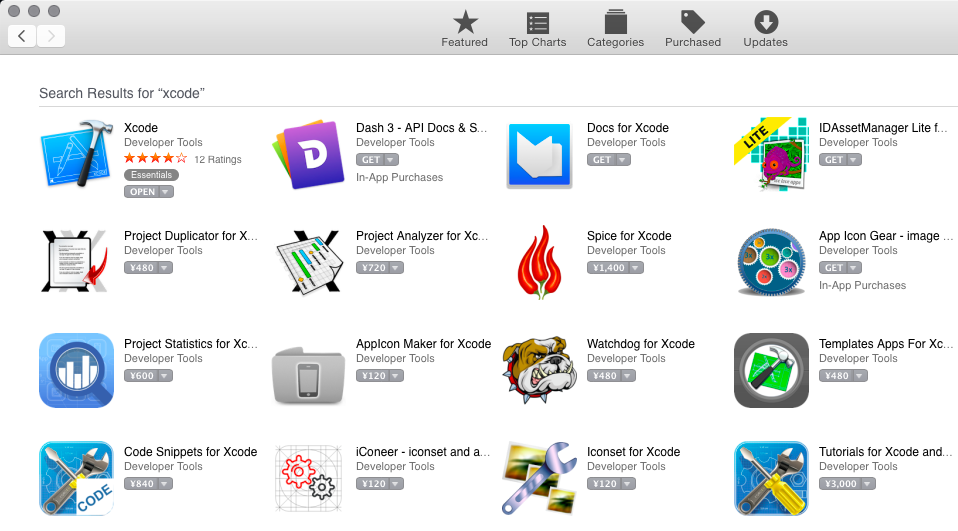
The newest version of Xcode is 6.4 equally of August 2015.
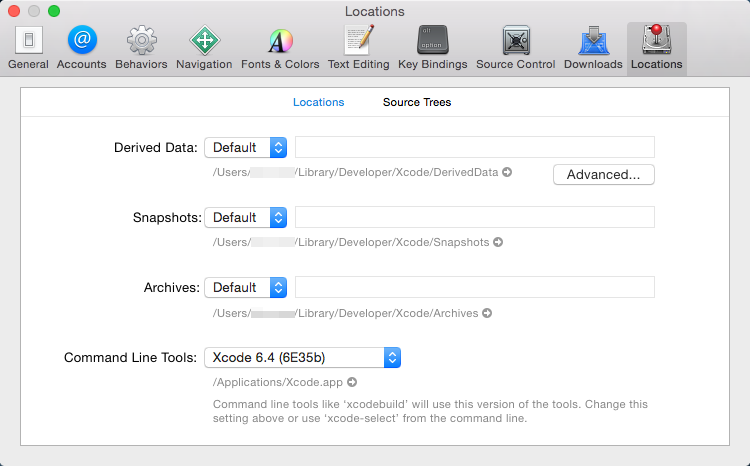
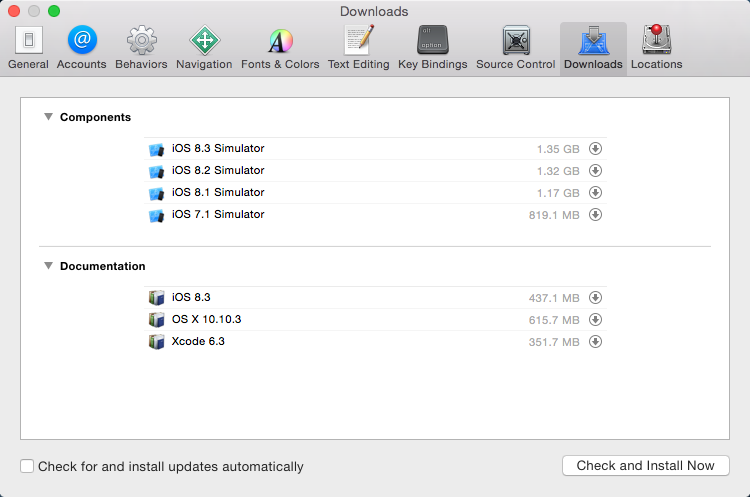
Xcode command line tools are a group of commands for development that yous can apply in the final.
Check that command line tools are useable in the [Locations] tab under [Preferences] in [Xcode] found in the menu. If you practise not currently have the command line tools yous can download them from the [Downloads] tab on the left.
2-3 Installing ios-sim
Here we will install the ios-sim which allows yous to hands use the iOS simulator from Cordova. This tin can be downloaded using Node.js.
Enter "sudo npm install ios-sim -yard" into the terminal and install the simulator.
If the version of the simulator is displayed when you enter "ios-sim --version", that means at that place is no problem.
$ sudo npm install ios-sim -one thousand
$ ios-sim --version
3 Deploying Games Using RPG Maker
Hither we will export the necessary game data, assets and game engine to a package from RPG Maker. Select [Deployment...] from the File Menu and the deployment dialog will announced. If y'all select [Android / iOS] and export, all the files needed for iOS packaging will be placed in the selected binder.
In this example, nosotros deployed to the desktop.
4 Packaging
Packaging refers to creating the ipa file which y'all allows you lot to install applications to an iOS device.
4-1 Creating an Xcode Projection
Allow'due south create an Xcode project using Cordova. In the end, we will be exporting an ipa file using Xcode.
4-1-1 Creating a Cordova Template
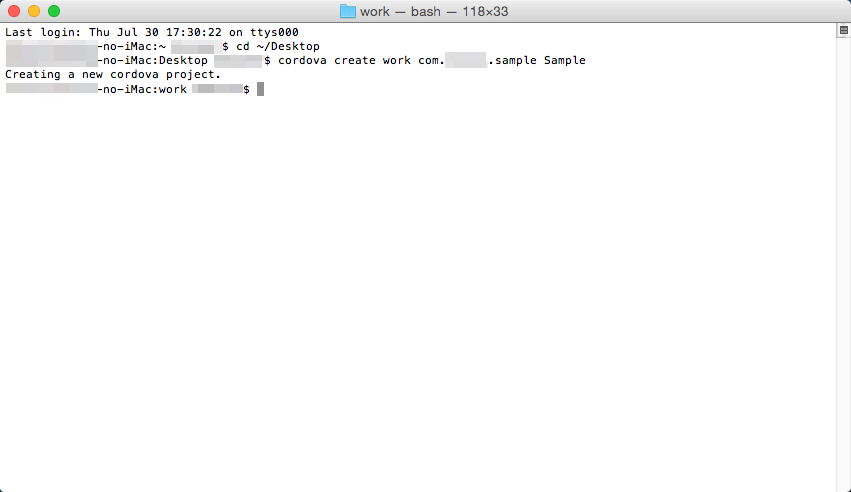
First, we will create a template using the "create" pick which is a Cordova command. Below is an example of a control that you would utilise in the terminal.
$ cordova create ~/Desktop/work com.instance.sample Sample
In the example above, we are creating a folder where you will work from called "work" on the desktop. The folder volition be the template, the packet name will exist set to "com.case.sample" and the app proper name will be set as "Sample".
*When really setting the package name, you cannot use "com.case".
iv-1-2 Calculation iOS Platforms
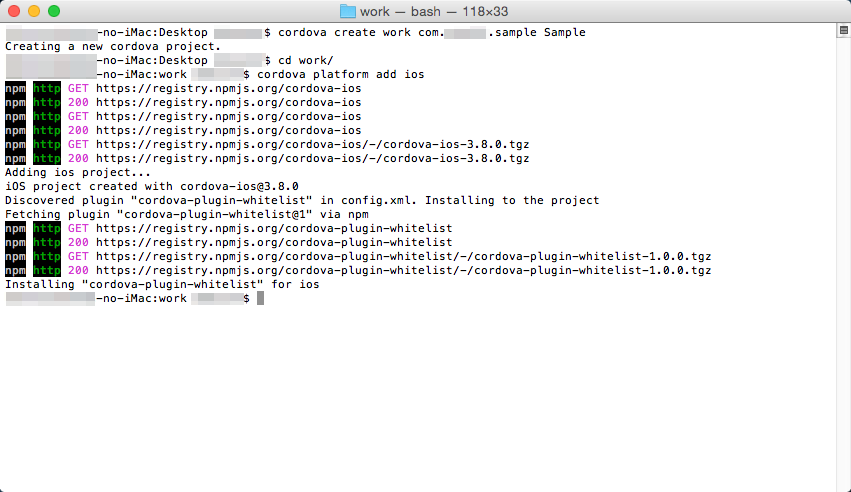
We volition add iOS files that y'all volition utilize to a template using Cordova. Enter "cd ~/Desktop/piece of work" into the terminal to move to the "work" folder that was created earlier. After moving to the binder, type "cordova platform add ios" into the last and press the return primal. Doing this will create the necessary files for running on iOS.
$ cd ~/Desktop/work $ cordova platform add ios
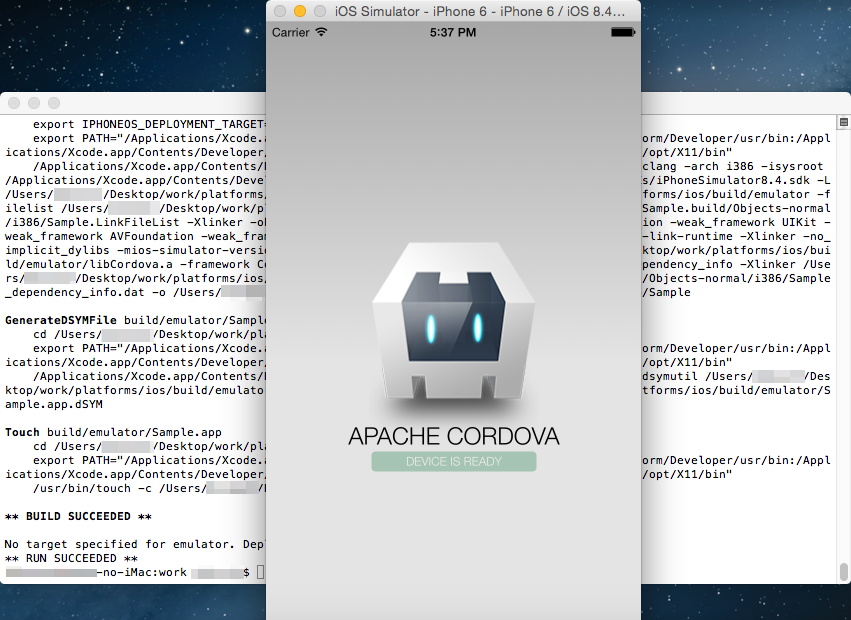
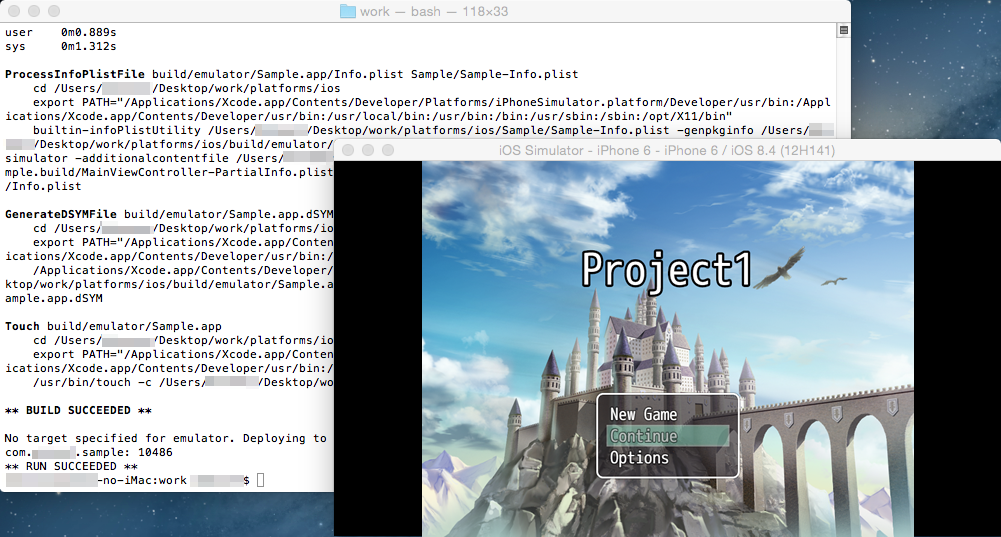
Use ios-sim to confirm everything you have done upward until now using an iOS simulator.
Enter "cordova emulate ios" into the concluding and press the render central. When the build finishes, the iOS simulator will automatically kickoff up and the template screen will be displayed.
$ cordova emulate ios
4-ane-3 Copying a Deployed Game
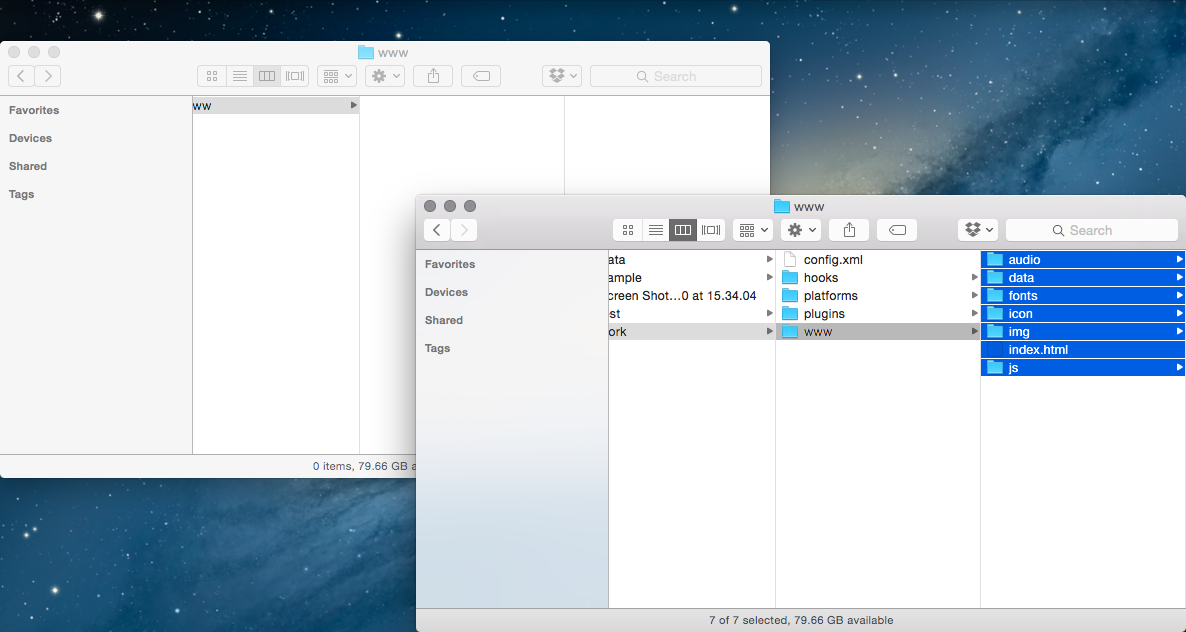
Here we will copy the deployed game data and other files to the "www" folder found within the "work" folder. Delete the entire contents of the already existing "work/www" folder, leaving information technology empty.
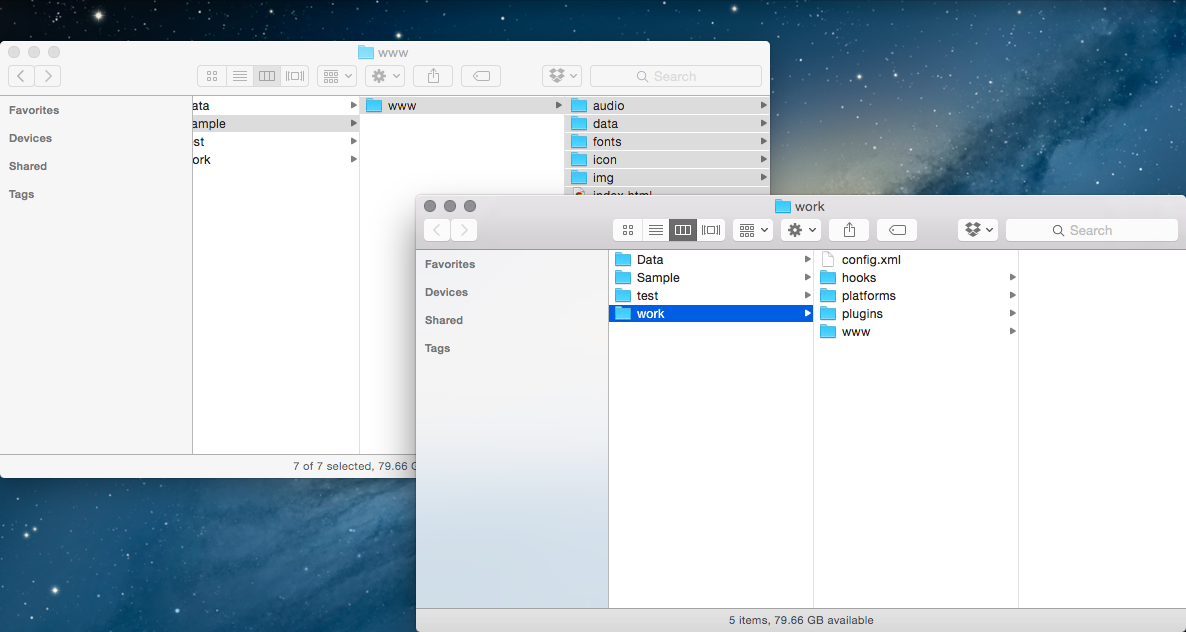
Re-create all the files within the "www" folder found inside the deployed folder to the "work/www" folder.
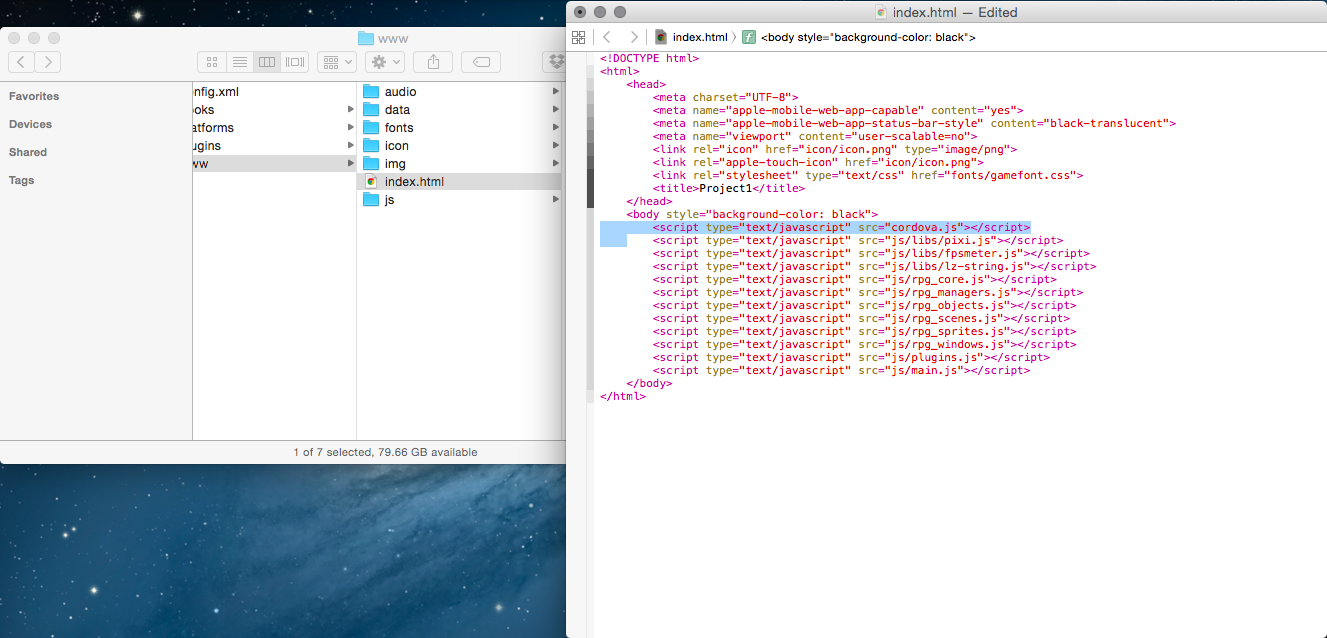
iv-1-4 Editing the alphabetize.html File
Let's make adjustments to the game's HTML for Cordova.
Open up the "work/www/index.html" file using your favorite text editor.
You will be adding one row, which is the below tag that will be added below <body style="background-color: blackness"> tag.
<script type="text/javascript" src="cordova.js"></script>
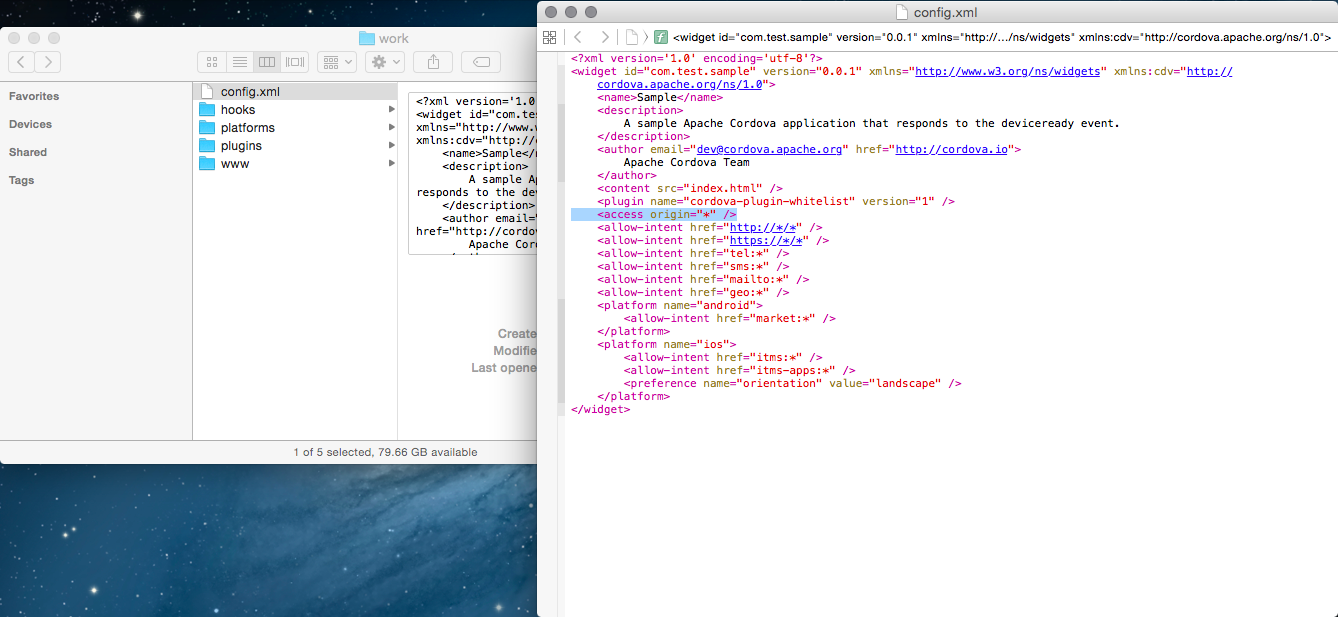
4-1-5 Editing the config.xml File
We will make some adjustments to the config.xml file that configures the behavior of your game app. RPG Maker is optimized for holding the device sideways, and then we volition set the screen's orientation to mural.
Open the "work/config.xml" file using your favorite text editor.
Add the below tag inside the <platform name ="ios"> tag.
<preference proper name="orientation" value="landscape" />
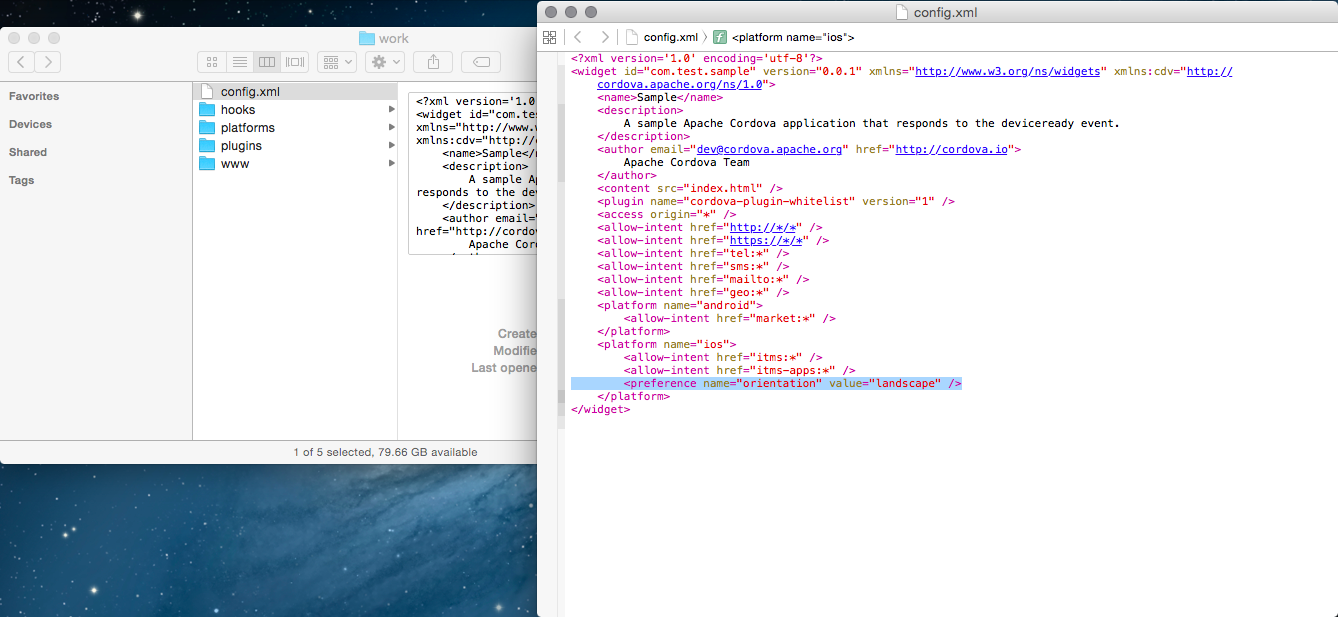
Additionally, at that place is also a row which has the tag <access origin="*">, which sets the application allow access to external HTML from the game's HTML.
This is not needed so go ahead and delete this line.
4-i-six Build
We've finished up the configuration so let'south make a build.
Enter "cordova build" into the last and press the return cardinal. Later on a while, your build will be complete.
$ cordova build
At this point, all of the settings necessary for running your game are now complete. Let'south meet if the app works using an emulator.
Enter "cordova emulate ios" in the terminal just as y'all did before.
$ cordova emulate ios
The game has started up.
4-1-7 Changing Icons
The app icon tin exist constitute in "work/platforms/ios/<App Proper noun>/Resources/icons".
If y'all are using your own original files, overwrite the same files using files of the same size and with the same proper name.
4-2 Creating a Provisioning Contour
To create an ipa file which tin exist installed on the actual iOS device, you lot will need a "provisioning contour" which is a file used for identifying applications.
To get a provisioning profile, you lot will need to register on Apple tree's [Apple Developer Program] (paid service).
Also, we will be calling the series of actions such as the implementation of the provisioning file into a package as "signing". For signing, you will demand files such equally a key file and document files that certify the cardinal file.
*The Apple Developer Programme site is oft updated and then the method of acquiring provisioning files may alter. If for some reason you lot have trouble completing the necessary actions or if in that location is anything you would like to know, delight ship an inquiry on Apple Programmer Program.
4-2-1 Creating a key file and Certificate Request & Registration
The document registration that you will exist doing here is simply required if you lot have not done this even so.
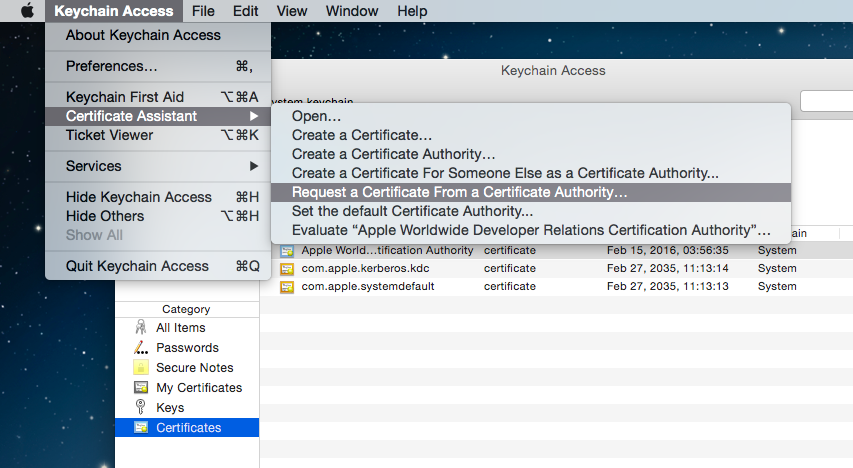
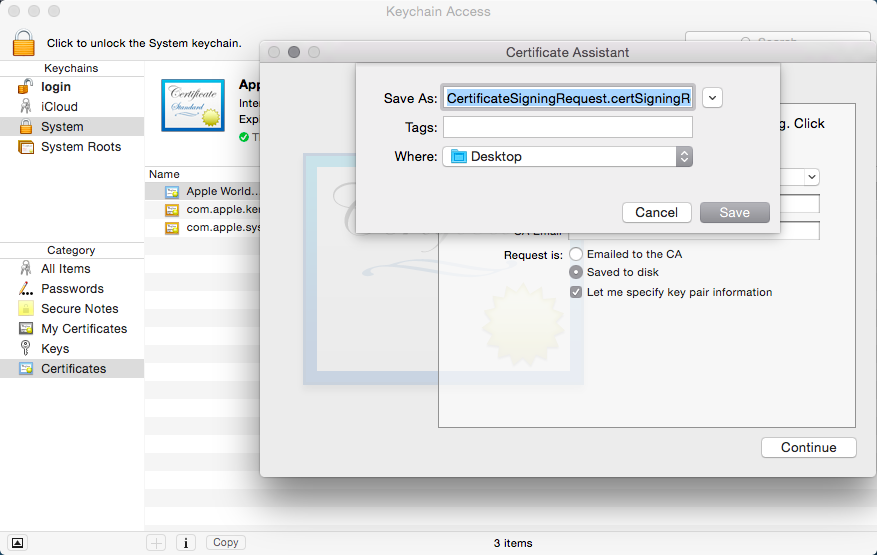
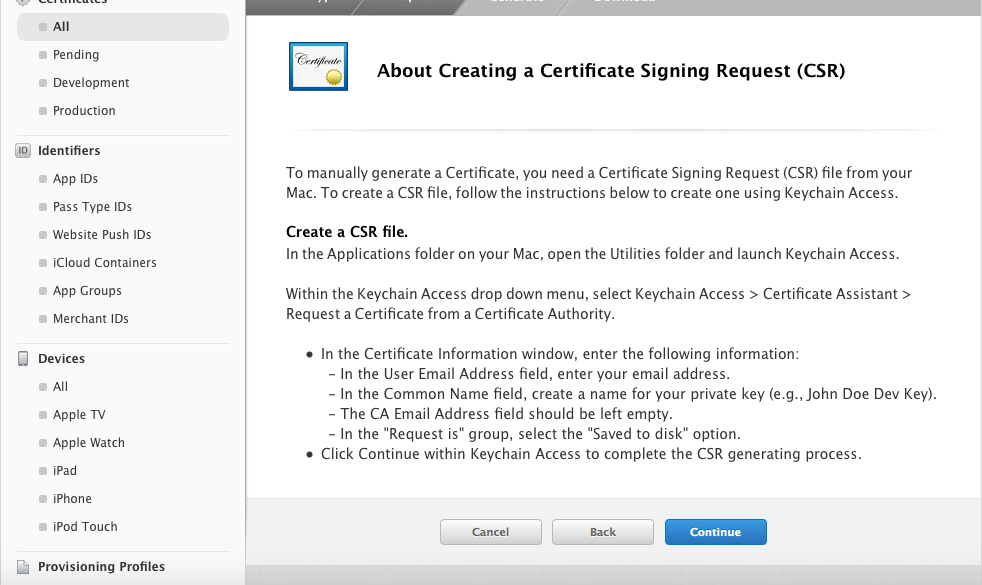
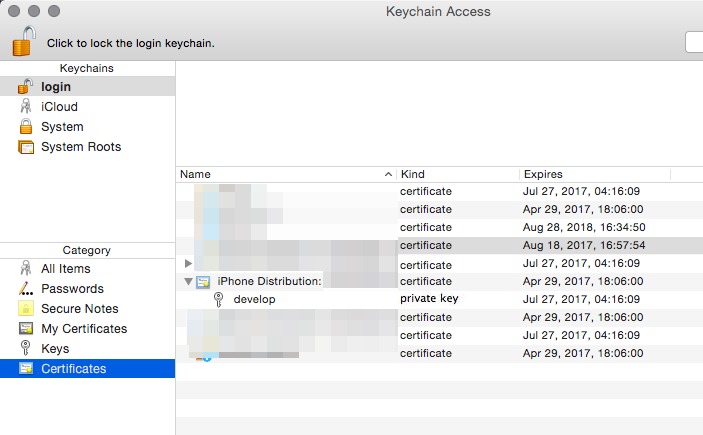
Beginning, we volition create a key file and request a certificate for that cardinal file. Nosotros will use "Keychain Access" for requesting a certificate.
Keychain Access is located in [Applications] → [Utilities].
Run Keychain Access, and select [Request a Certificate From a Certificate Authority] in [Certification Assistant] found under [Keychain Access] in the bill of fare.
For the user e-mail address, use the e-mail address that y'all used to register on Apple Developer Program, and choose a proper noun for the common name that is easy to understand. Fix the asking procedure to [Saved to disk] and check [Allow me specify key pair information].
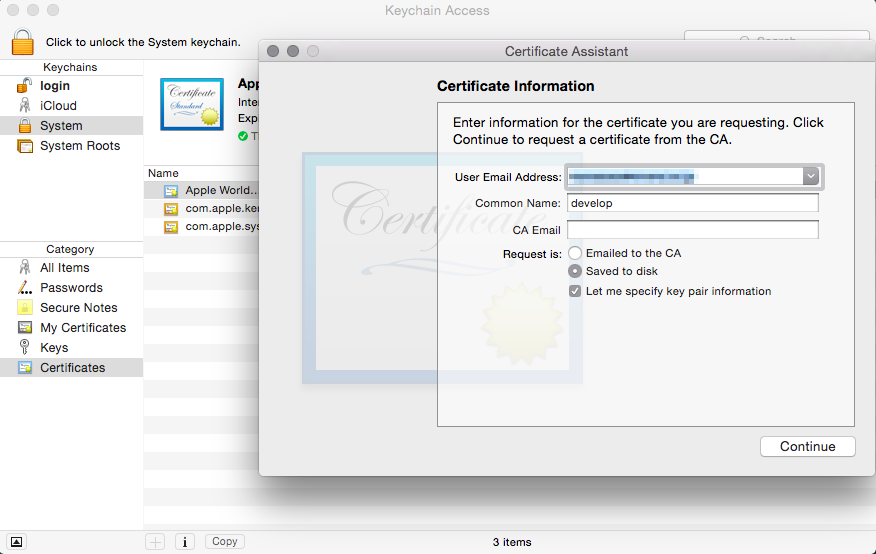
Salvage the request file.
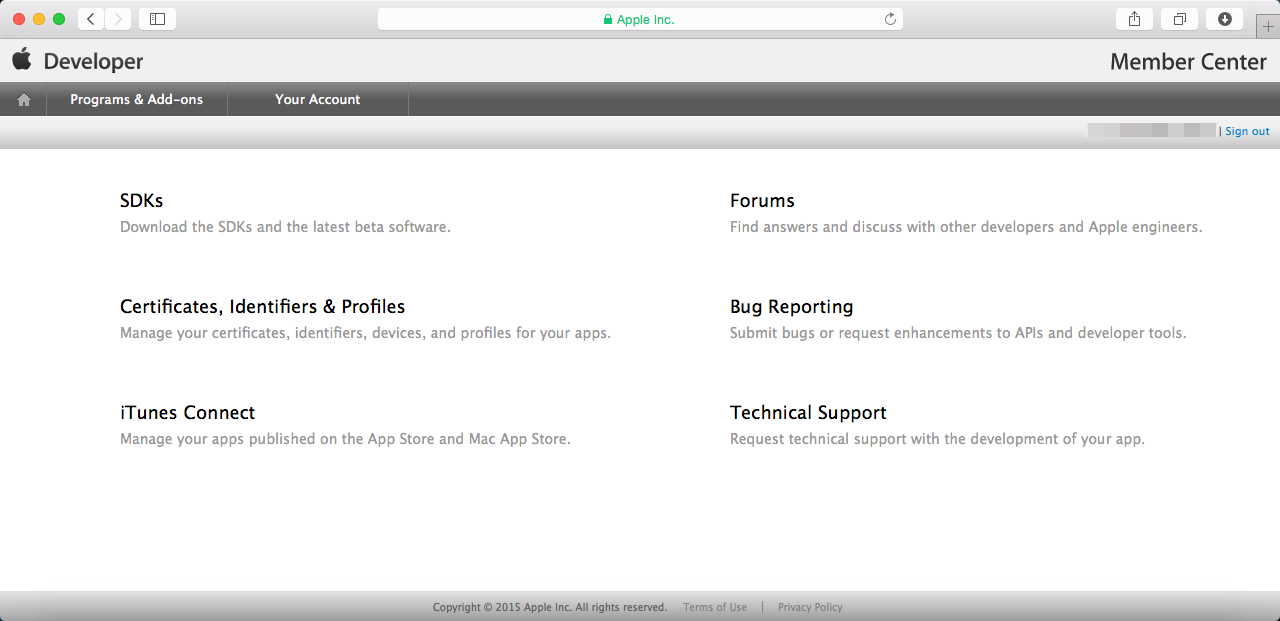
Select [Certificates, Identifiers & Profiles] from the Apple Developer Program member center.
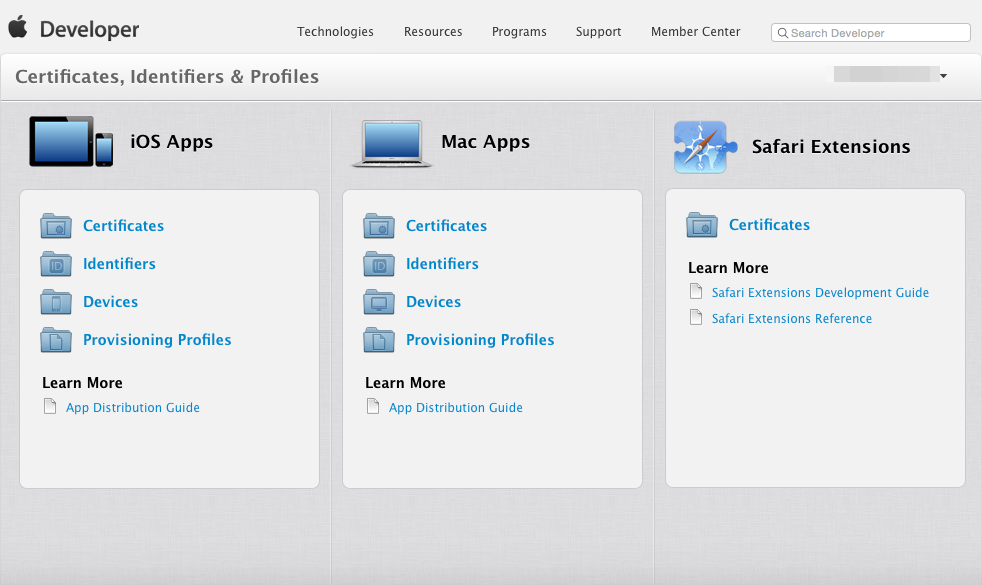
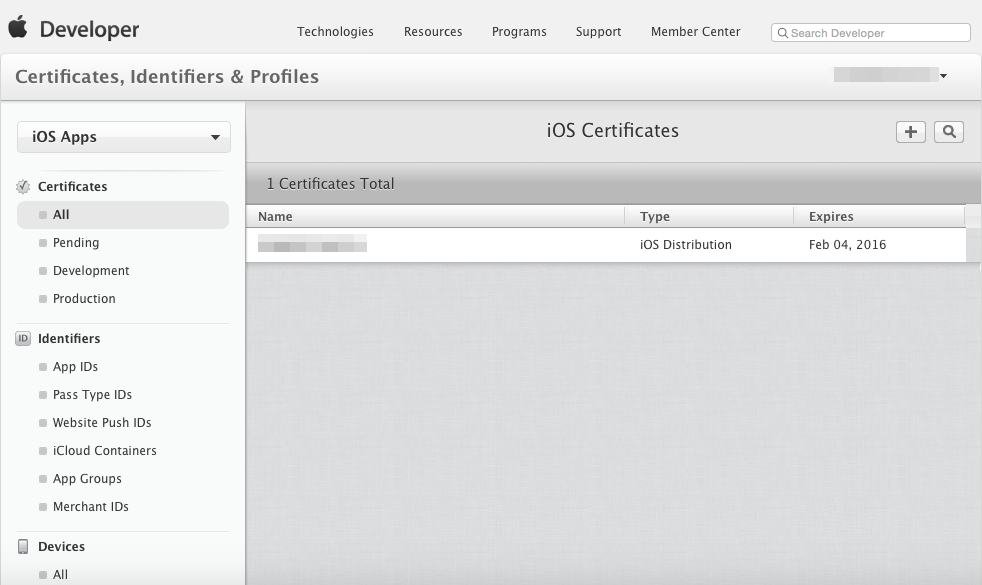
You will move to the certificate management screen when yous select [Certificates]. Select [All] in the left pane, and printing the [+] button in the upper right.
Select [App Store and Ad Hoc] for the certificate type.
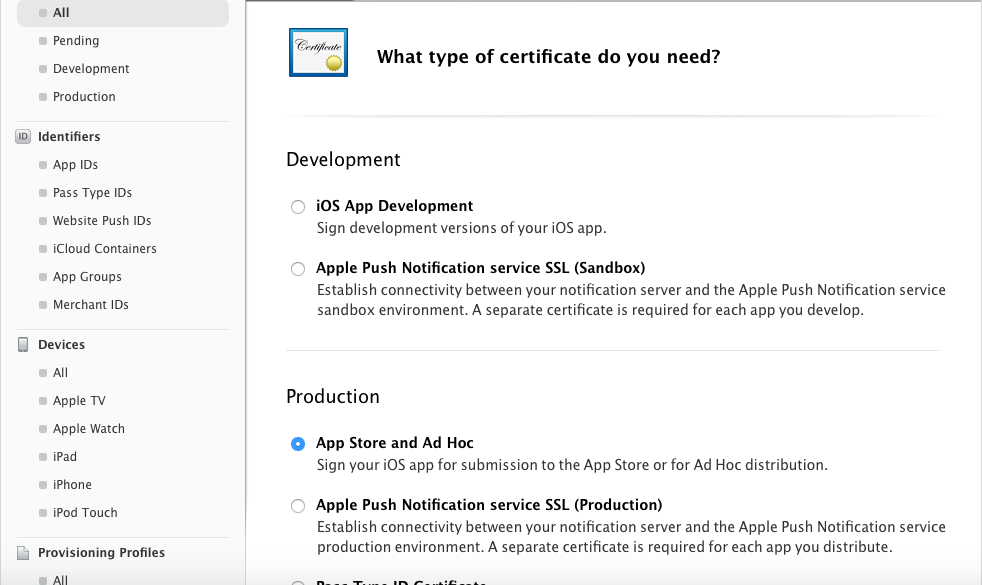
Go on to the next screen.
In the request certificate selection screen, select the request file which you lot fabricated using Keychain Access.
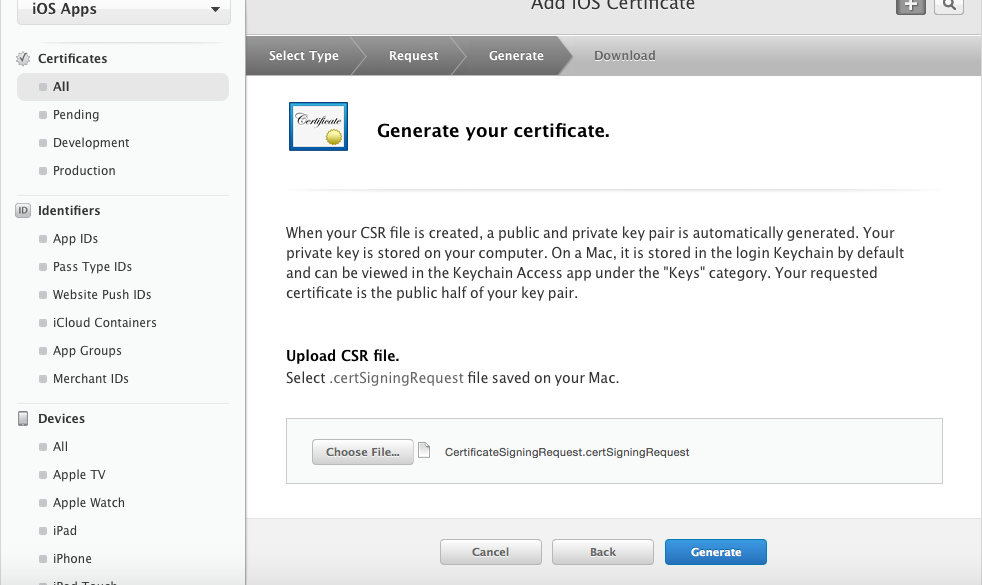
The document has now been issued. Download the certificate.
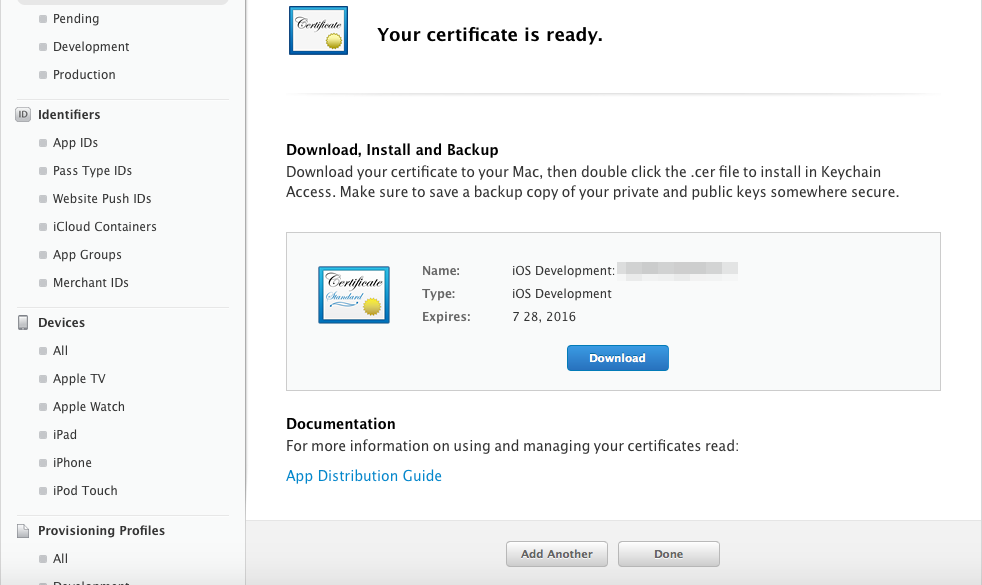
If you double-click the downloaded certificate, it will exist loaded into Keychain Admission.
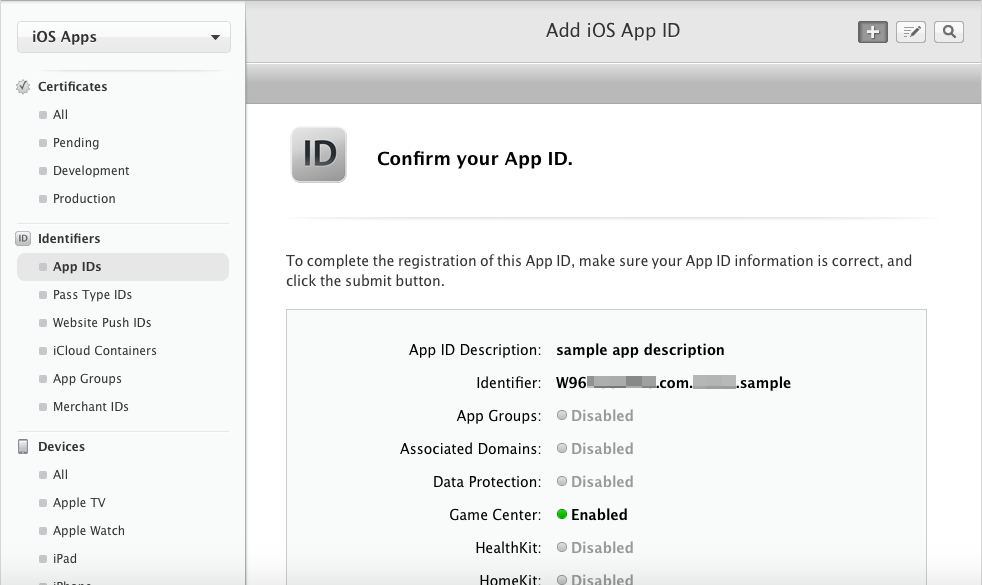
4-ii-2 Creating an App ID
Adjacent, we will create an App ID which will be used to make the package.
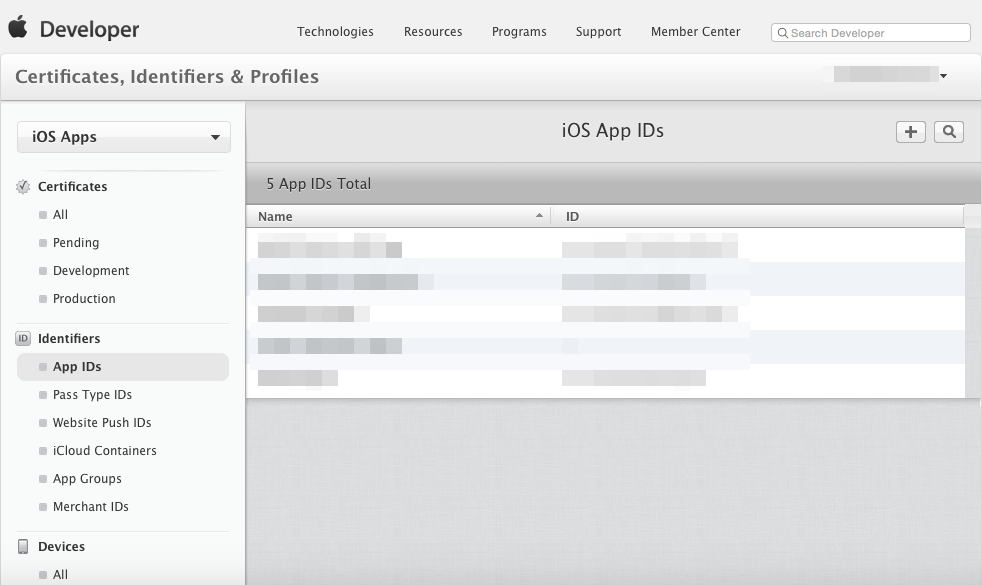
This will be carried out in the [Identifiers] section in the Apple Developer Program site which you used earlier.
Select [App IDs] under [Identifiers] in the left pane, and press the [+] push button in the upper correct.
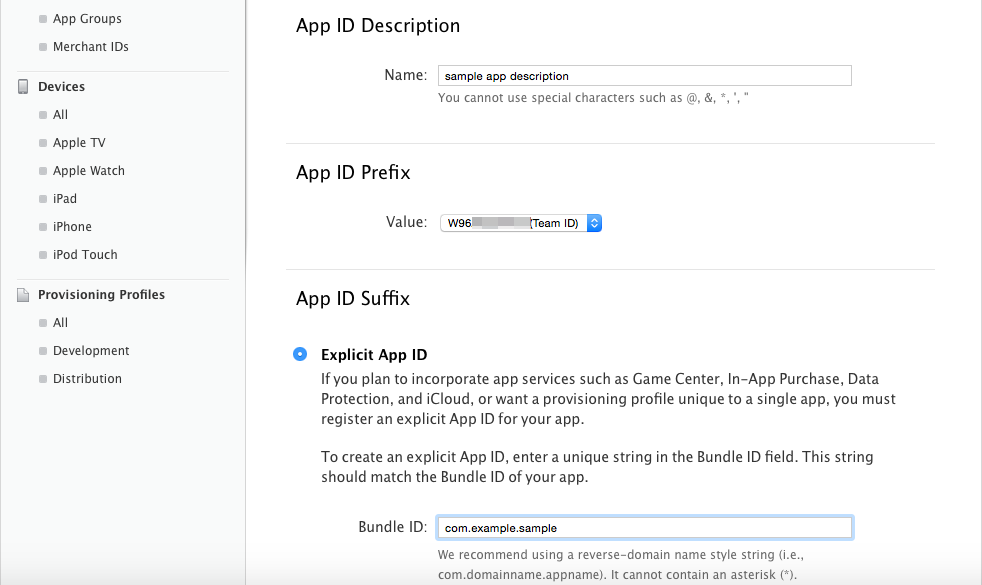
Enter a name that is easy to think in the [Proper noun] section under [App ID Description].
Enter the [Bundle ID] in the [Explicit App ID] section under [App ID Suffix]. But like the provided example, the domain name is used in reverse with the summit level domain ("com" in the example) and is connected using a ".". Following at the finish is your game's name ("sample" in the case).
*Delight keep in mind that yous cannot actually use example.com.
Example:
When the domain that you own is [example.com] and your game's proper name is [sample], you would write:
com.example.sample.
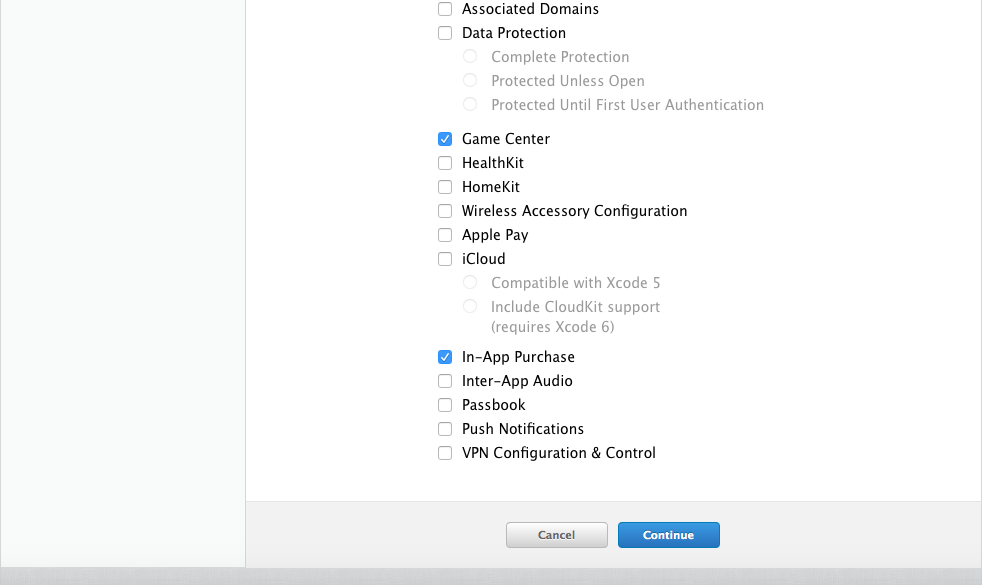
Select the appropriate option from the section below, and click [proceed] to keep to the finish.
Your App ID has been created. There will be a prefix fastened to the identifier (here information technology is W96~). Yous volition need this for afterwards and then make a annotation of it somewhere.
4-two-3 Registering a Device
Allow's annals the UDID so that we tin can install to the device that you are using. Y'all are able to annals on the Apple Developer Plan site.
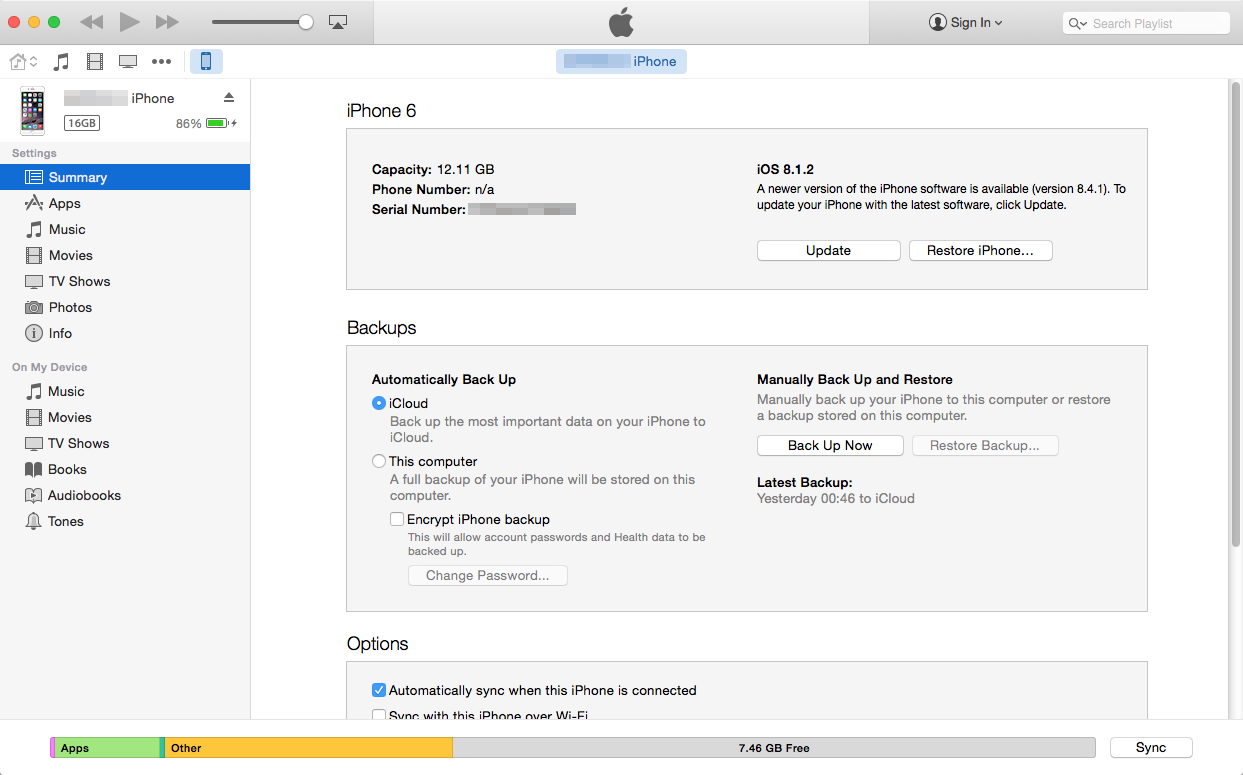
UDID is the unique serial number for each iOS device which can be checked using iTunes. Connect the device to your Mac and open up iTunes. In the device'south overview, you can bank check the [Serial Number]. The UDID will be displayed by clicking this number. Copy the UDID past right-clicking.
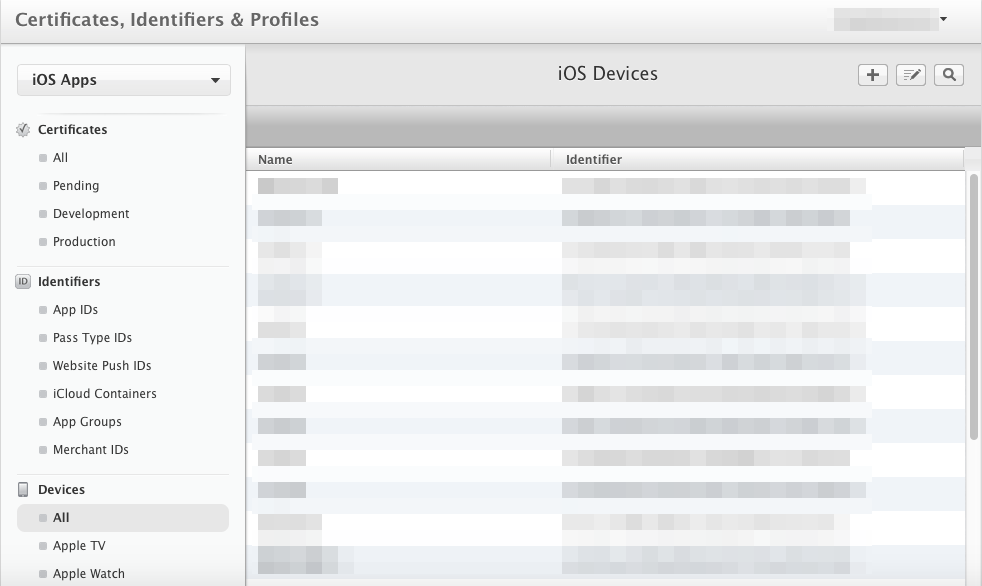
Select [All] under [Devices] in the left pane of Apple Programmer Program, and click the [+] push at the summit correct.
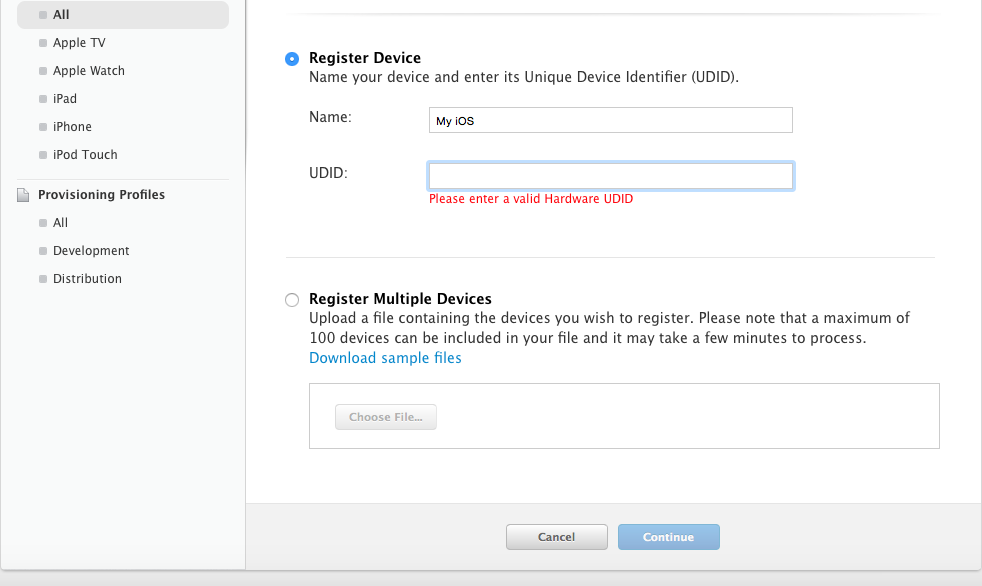
Enter a name that is piece of cake to retrieve in the [Proper name] section, paste the [UDID] that was copied earlier. After doing so, click [Continue] then [Register] to annals the device.
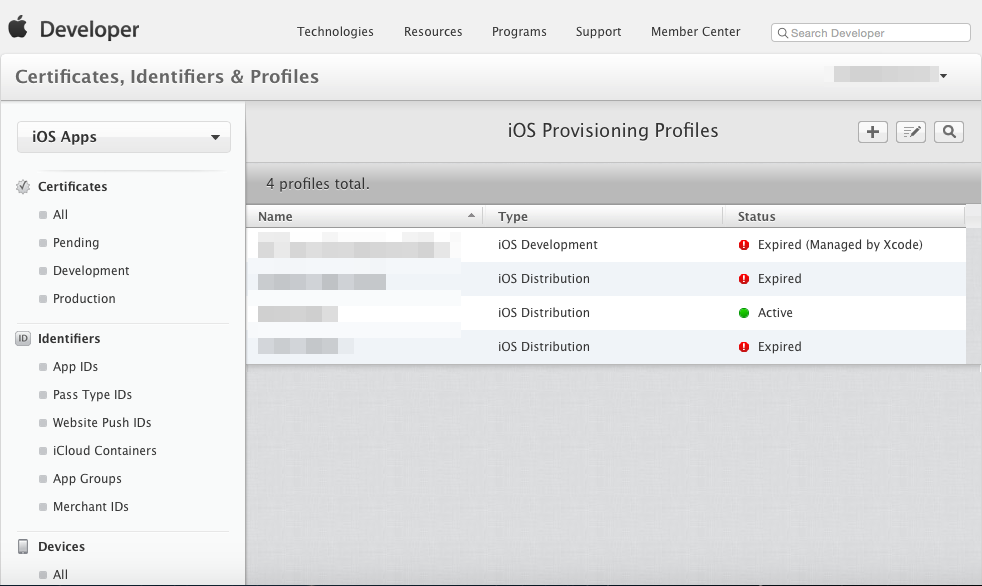
four-two-iv Creating and Registering a Provisioning Profile
Next, we will have intendance of some things on the Apple tree Developer Program site.
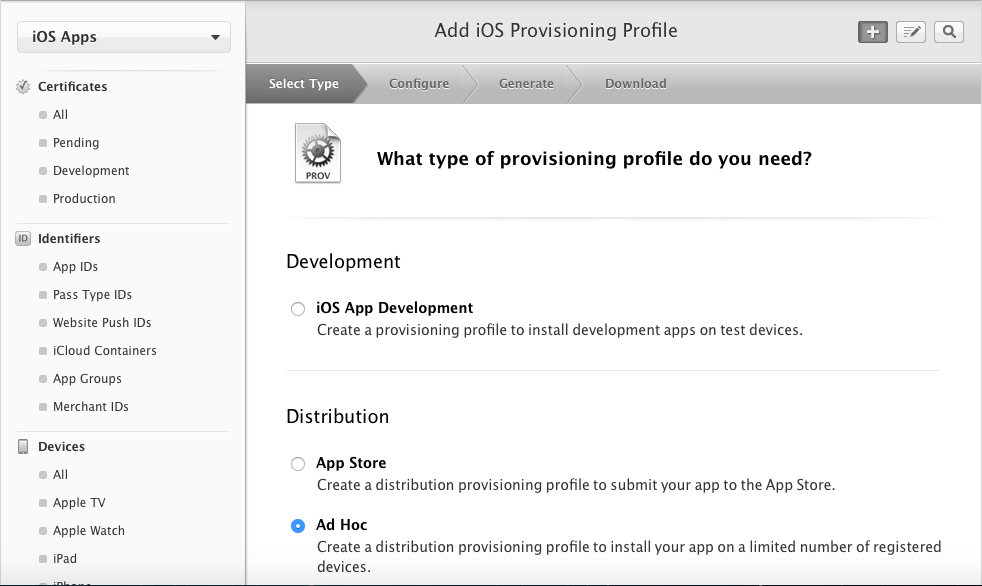
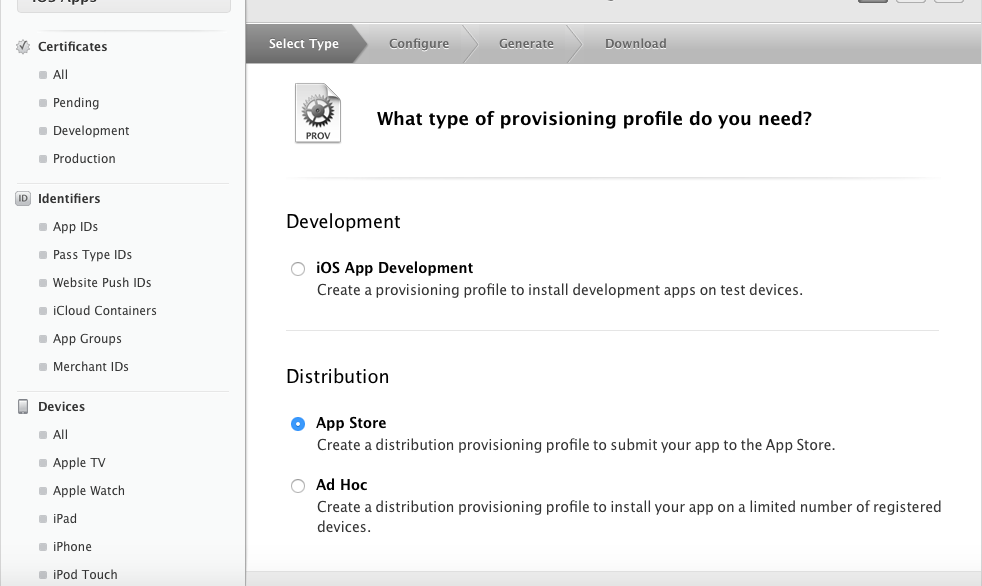
Select [All] under [Provisioning Profiles] in the left pane, and click the [+] push in the upper right.
Select [Advertizement Hoc] under [Distribution] equally the type.
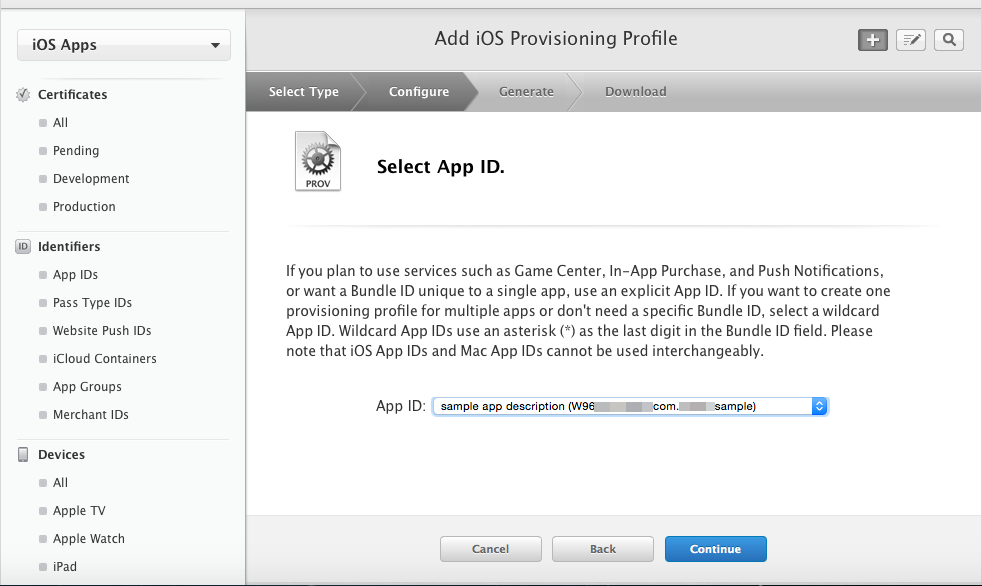
Here we will use the [App ID] that we created before.
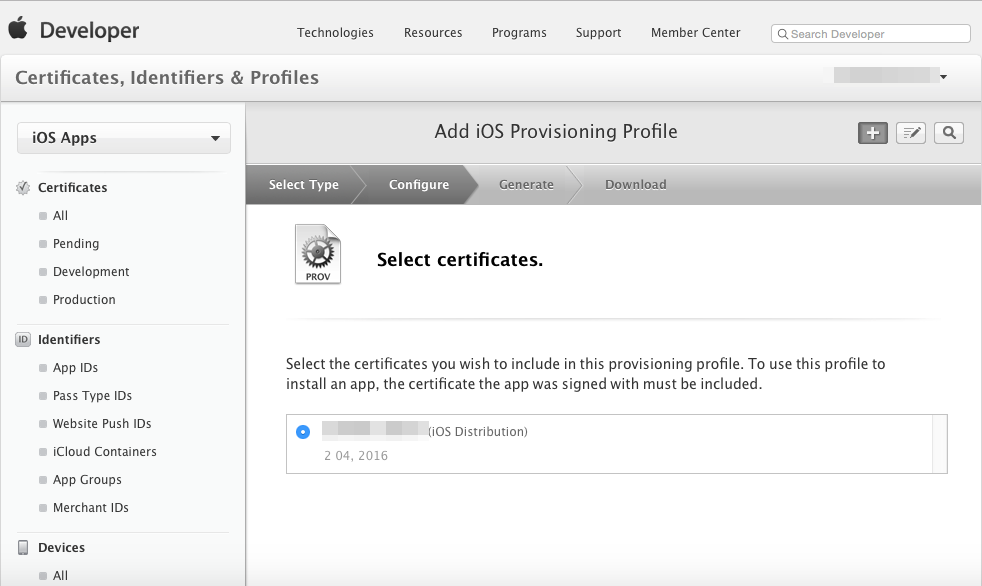
Select the certificate that we made dorsum in 4-2-1.
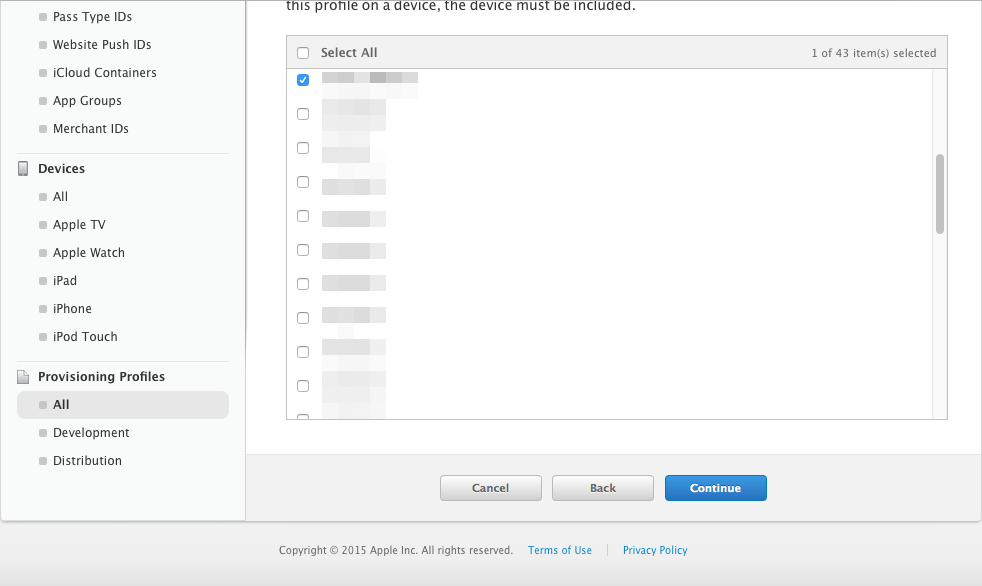
Similarly, we will set [Device] to the device which nosotros added earlier.
Enter a proper noun that is piece of cake to remember in the [Profile Proper name] section.
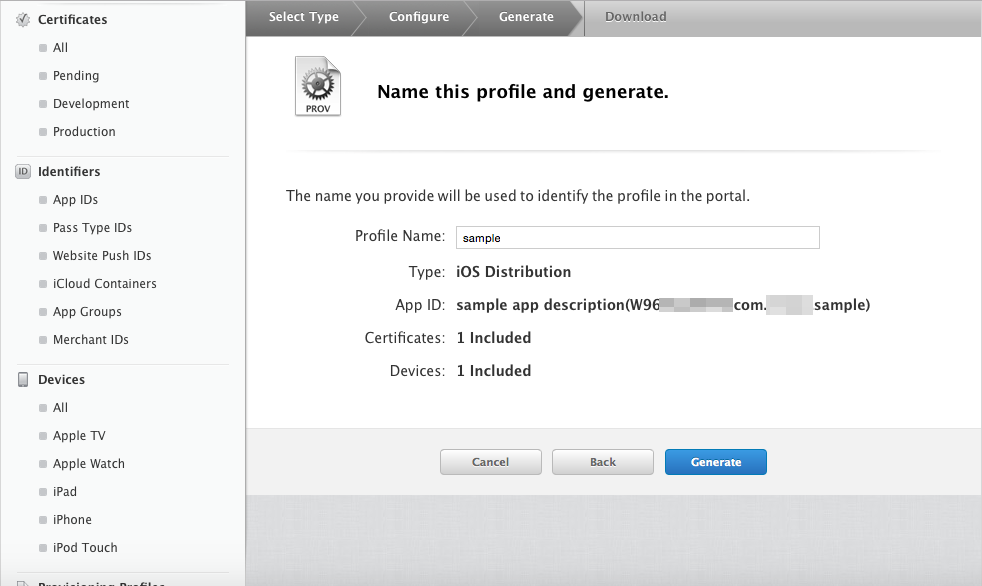
With this, you are proficient to go. Download the provisioning contour.
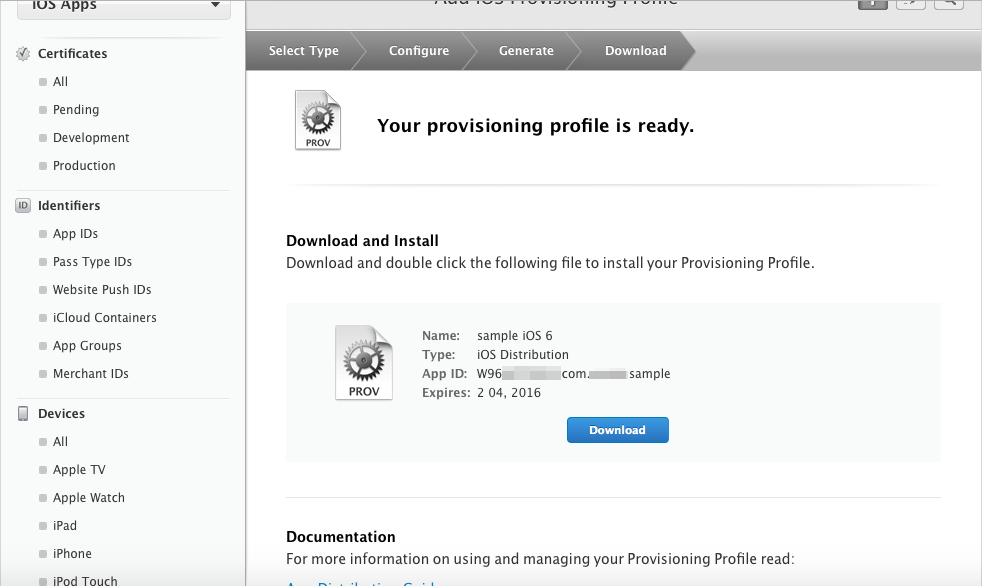
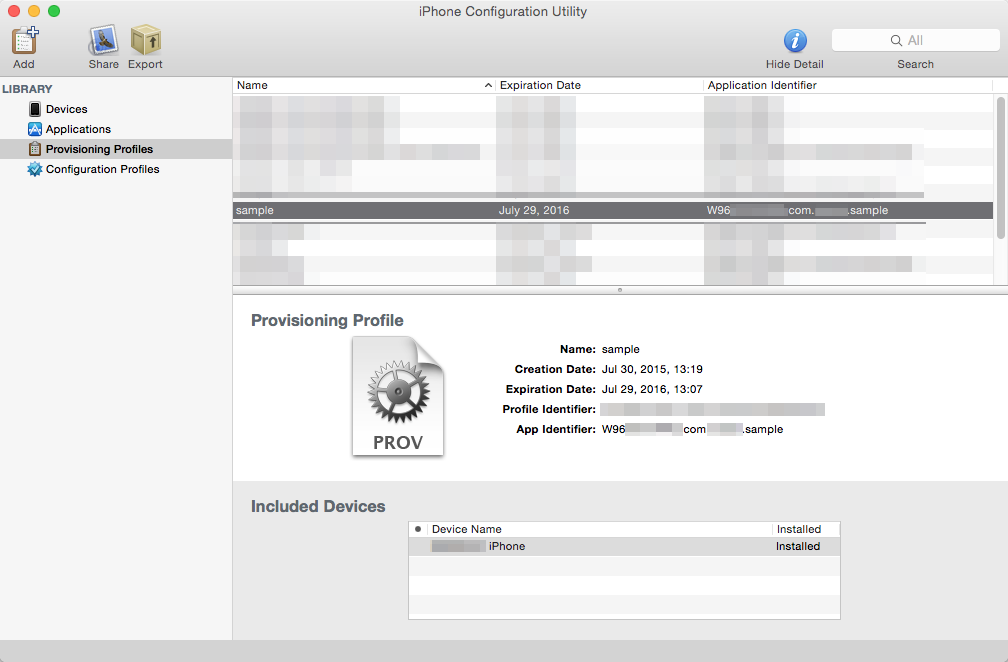
Double-clicking the provisioning file that you have downloaded will beginning the [iPhone Configuration Utility], and the provisioning file volition be loaded.
4-3 Packaging to an ipa File
Permit's create the ipa file which can be installed on to your device. Here we will create an ipa File which you can install on your iOS device.
4-iii-1 Annal and Signing
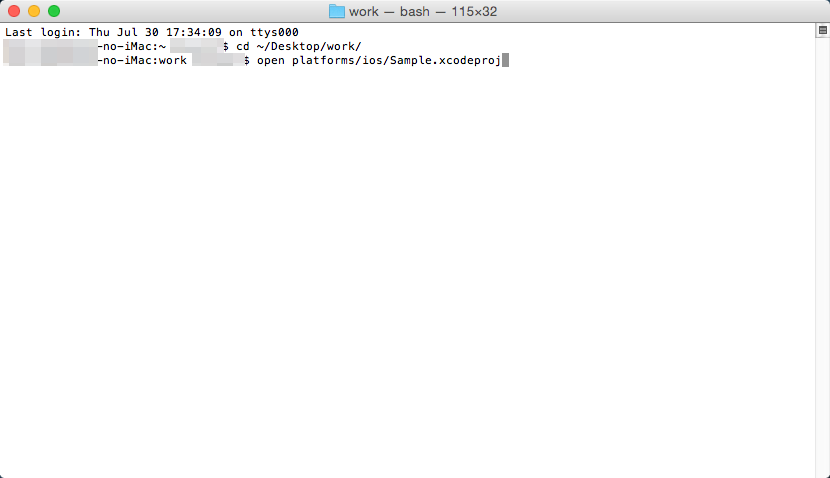
Open your work folder using the terminal. Enter "cd ~/Desktop/work" into the terminal and press the return primal.
Open up the xcodeproj file which was generated using Cordova in Xcode. Enter "open platforms/ios/Sample.xcodeproj" in the terminal and press the return fundamental.
$ cd ~/Desktop/work $ open platforms/ios/Sample.xcodeproj
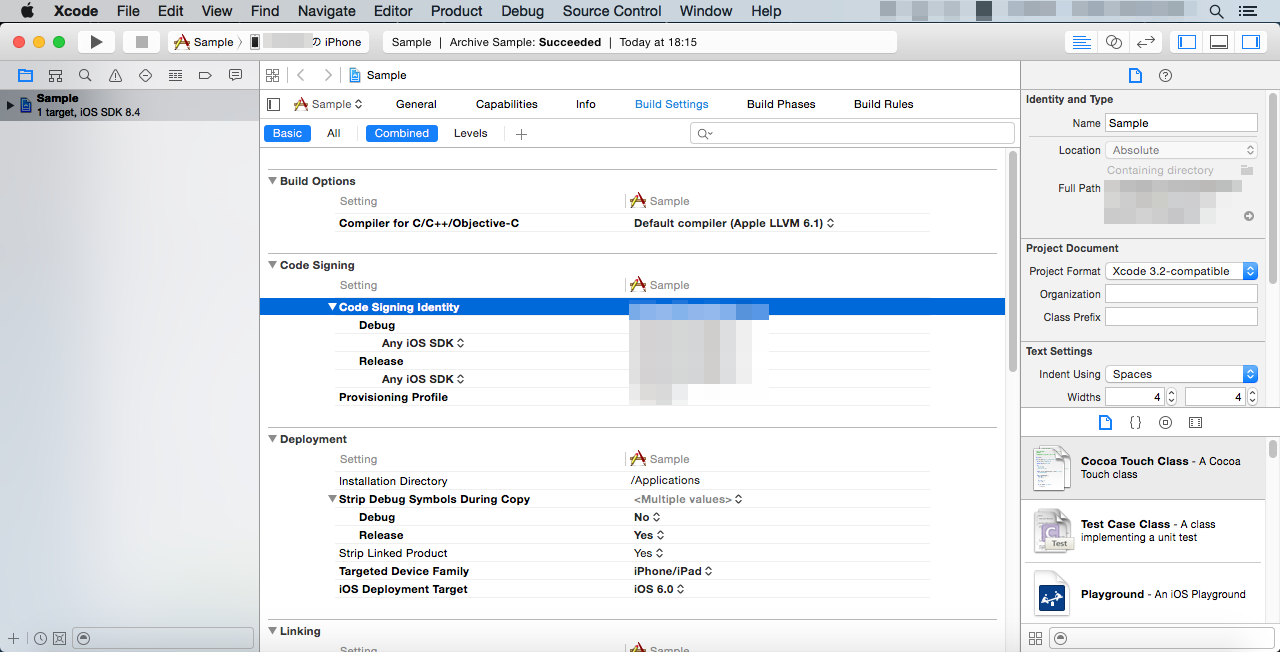
Xcode will start upwards. Select [Sample] in the left pane, and open up the projection settings. Set the target to "iOS Device" setting it up then that a build can be made for the device.

Utilise the same identifier gear up for the [App ID identifier] configured in 4-2-2 for the [Bundle Identifier].

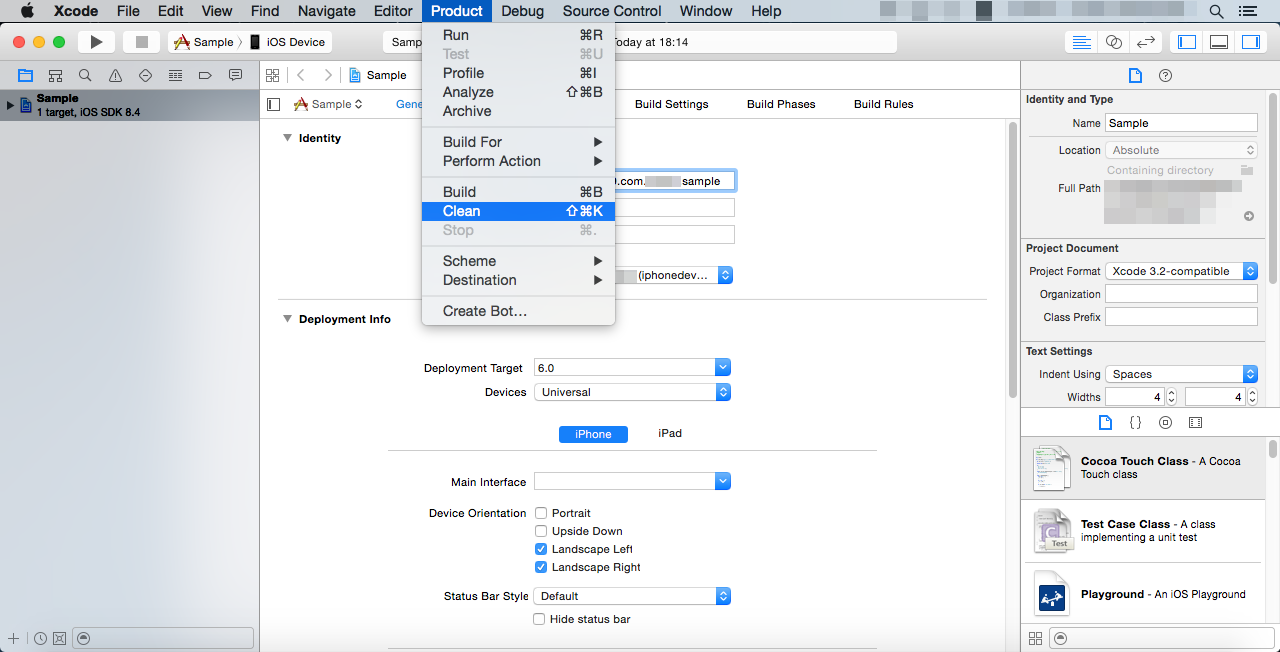
Merely in case, allow's brand sure the projection is clean. Select [Production] → [Clean] from the file carte.
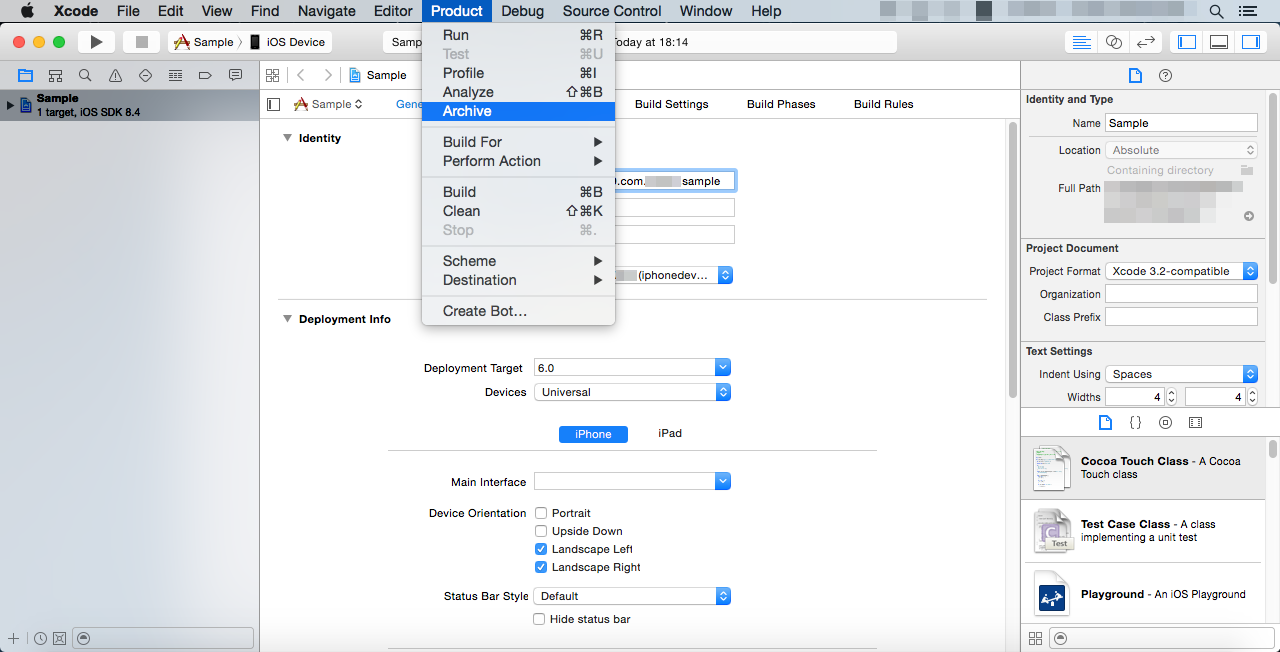
At present let'due south create an archive to and gather all the files into i. Select [Product] → [Annal].
The Organizer window will open once the archive is successfully made, and the archive for this project will exist displayed.
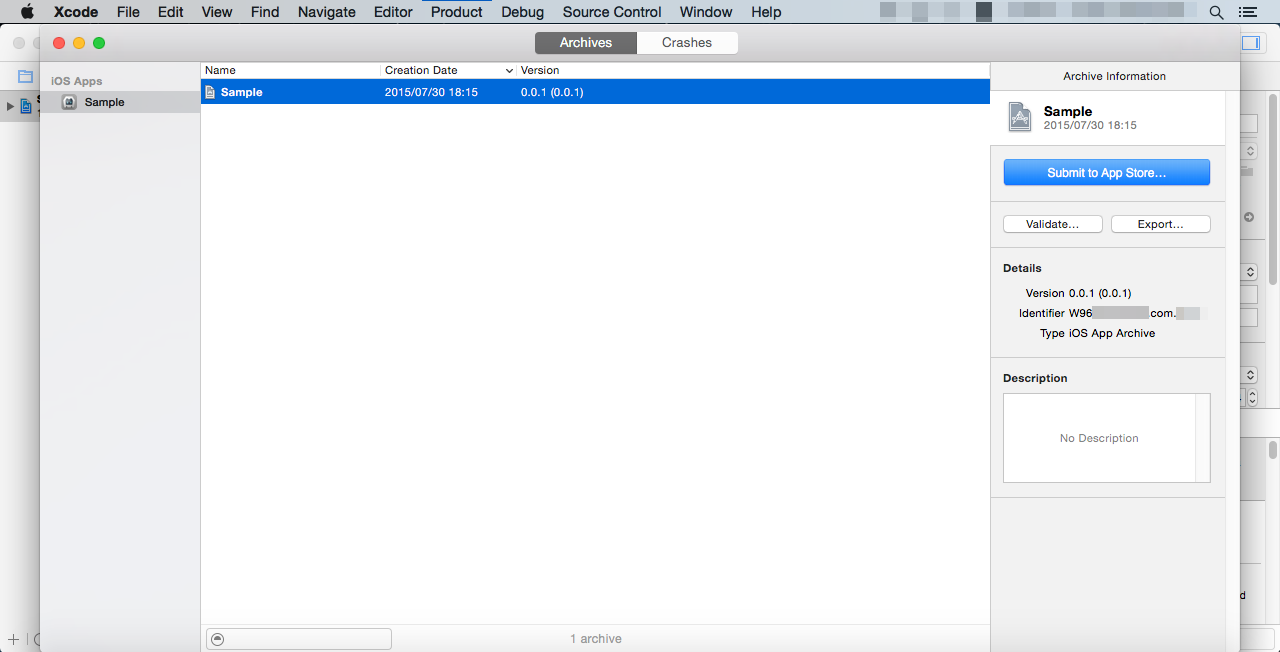
Correct-click the archive and when you select [Testify in Finder] you can open the location of the archive file in the Finder.
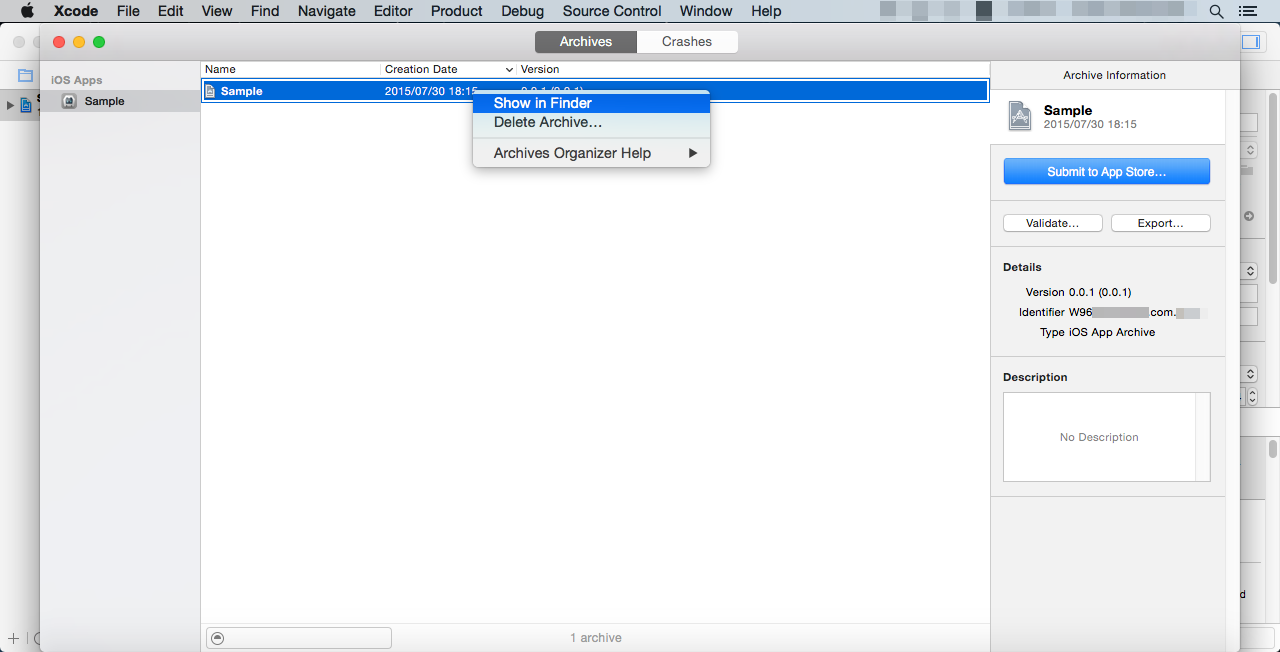

The annal will be located relatively securely nested in folders at /Users/<User Name>/Library/Programmer/Xcode/Athenaeum/Date/
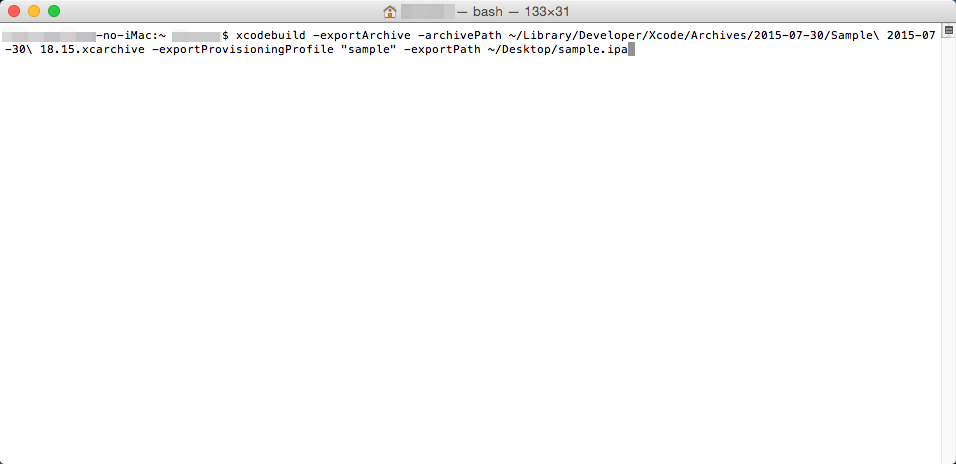
It'south possible to besides export the bundle as is using [Export...] in the correct pane of the Organizer, but since we want to explicitly specify the provisioning profile, nosotros will export from the final. We volition use the "xcodebuild" control to consign using the terminal.
Below is an example of a command.
$ xcodebuild -exportArchive -archivePath ~/Library/Developer/Xcode/Archives/2015-07-29/Sample\ 2015-07-29\ 18.32.xcarchive/ -exportProvisioningProfile "sample" -exportPath ~/Desktop/sample.ipa
We are having the annal be exported to the ipa file using the "exportArchive" option.
The archivePath option specifies the archive file which we made before.
The exportProvisioningProfile option specifies the provisioning profile. This is what was registered in the iPhone Configuration Utility in four-2-iv. Exist sure to enclose these in double quotes.
The exportPath option specifies the path of the ipa file. Here we are exporting sample.ipa to the desktop.
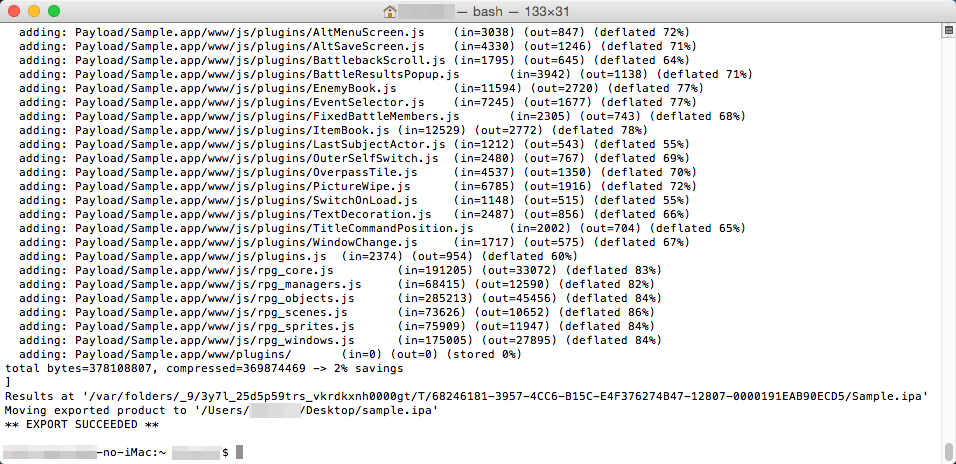
The consign is successful when y'all come across "EXPORT SUCCEEDED". The signed ipa file will be exported.
4-4 Installing to the Device
We will use iTunes to install the app to the device.
Connect your iOS device to your Mac and start up iTunes. Elevate and drib the ipa file created earlier into the [My Apps] listing.
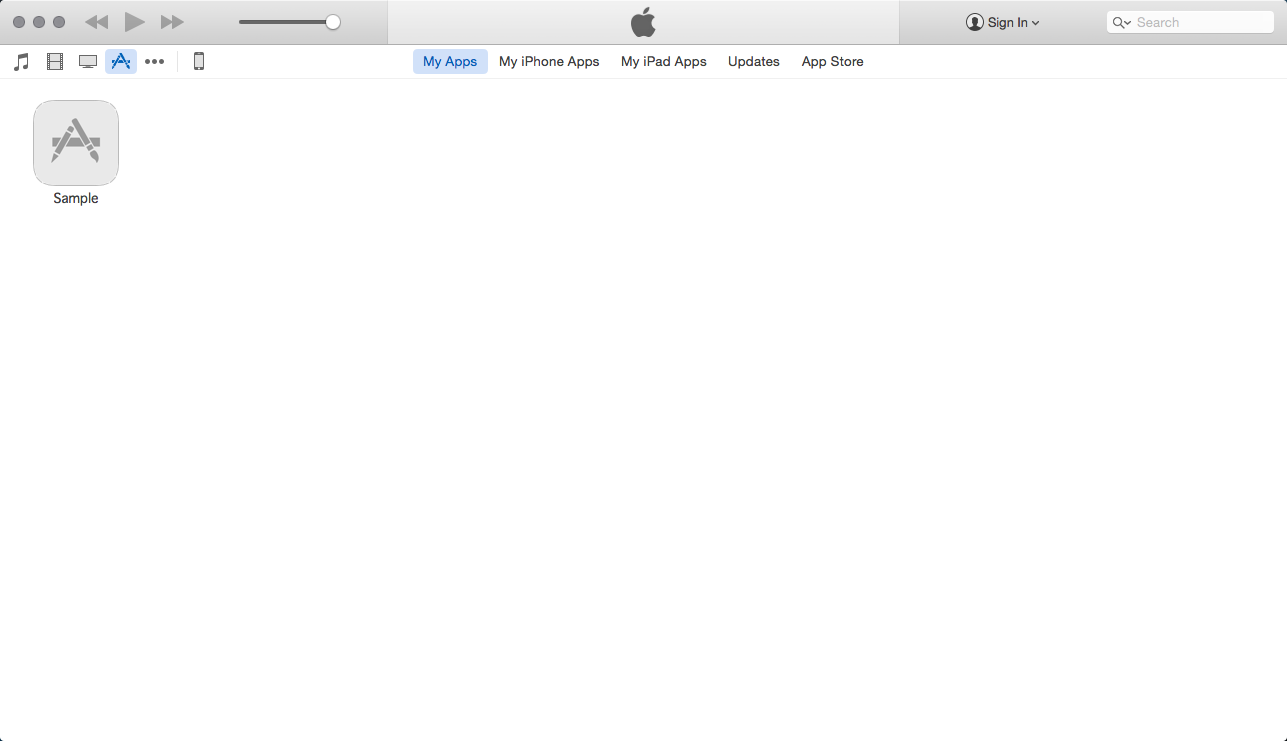
Open up the App settings of your device. Your game will exist installed when you lot drag and driblet the app into the meridian screen on the right and click the [Apply] button.
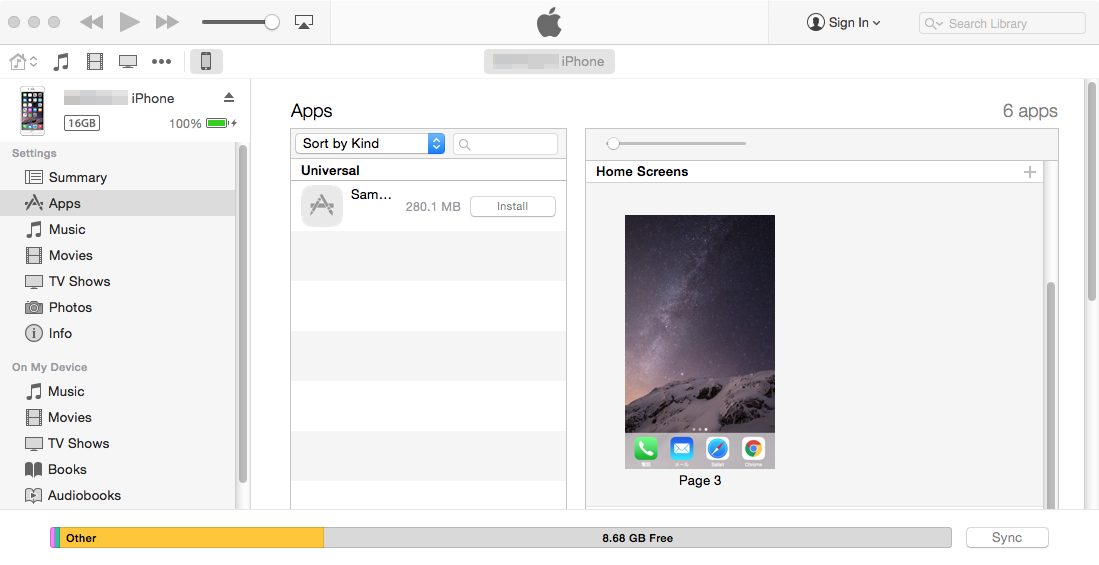
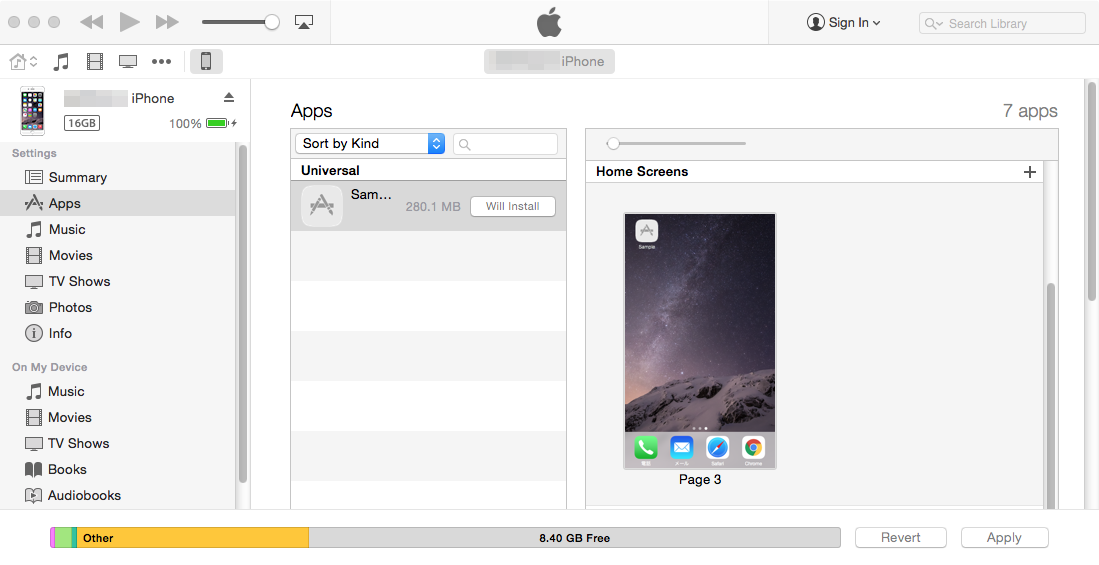
*You cannot install on any other devices other than the ones that were added to the provisioning profile in four-2-iv.
5 Publishing to the App Store
You will need a provisioning contour for the App Shop in lodge to publish to the App Store.
Select [App Store] equally the kind of provisioning contour.
It is convenient to use Xcode for the app review on the App Shop. Before yous start archiving, let'southward configure some points such as the provisioning profile for the App Store. There is the [Lawmaking Signing] specification in [Build Setting] under the project settings.
You can observe the [Submit to App Shop] button in the right pane of the Organizer so information technology is possible to submit the parcel file from hither.
*Y'all volition need your ain original content for the icons, splash screen, preview images, etc. For more information, please refer to specialized books.
Source: https://rmmv.neocities.org/page/01_11_06.html
0 Response to "Rpgmaker Mv How to Upload to Ios"
Post a Comment